# Airdesk Documentation

Welcome to Airdesk's documentation. Discover our useful features.

Thank you for visiting Airdesk's documentation  👋

![](https://4075187781-files.gitbook.io/~/files/v0/b/gitbook-legacy-files/o/assets%2F-MMGy7hswNWyyiXACRWv%2F-MUEsB4ag4PApaPLIyQm%2F-MUEtWcCzbNVYHJTon14%2Fairdesk_documentation.png?alt=media\&token=02141a42-3c3d-4d69-a6d5-8165fcfe10c6)

{% hint style="warning" %}
Both Airdesk platform and the docs are in phase β (Beta). It means that they are constantly evolving, in terms of features and concepts, as well as the design.
{% endhint %}

Discover what is the purpose of the documentation:&#x20;

✅ To understand concepts. \
✅ To understand how the interface works. \
✅ To understand the advantages of each module. \
✅ To understand the organizational structure.&#x20;

Is there any information missing?&#x20;

If you encounter any problem with the documentation or have suggestions on how to improve it or the project in general, send us a message in the [**help section**](/help-support/how-to-ask-for-help).&#x20;

{% hint style="info" %}
Before you begin to explore Airdesk, read carefully the section [**Before You Start**.](/before-you-start)
{% endhint %}


# Before You Start

Read this section carefully before you start using the documentation.

Select one of the categories below to learn more.

{% hint style="info" %}
This documentation is constantly being updated. Please add it to your favorites and visit it frequently.
{% endhint %}

## How to use the documentation&#x20;

This document was created to help Airdesk users. You should bear in mind that some of the features addressed in it may not be available. &#x20;

## How you can help us&#x20;

At the end of the documentation, you'll find 3 buttons that allow you to vote page by page. You can vote:&#x20;

* Good&#x20;
* Neutral&#x20;
* Bad&#x20;

![](https://4075187781-files.gitbook.io/~/files/v0/b/gitbook-legacy-files/o/assets%2F-MMGy7hswNWyyiXACRWv%2F-MMH-c1IYH-1SbP5Fu8Z%2F-MMH0S49iCmYB1SfFMw-%2Fimage.png?alt=media\&token=5697a498-28da-4ff0-8e08-c5d964cfa312)

We ask you to be honest. You should vote: "Good", when the documentation really helped you find the answers you were looking for; "Neutral", when the documentation is well done and clear, but didn't help you solve the situation; "Bad", when the documentation is incomplete or not explicit.


# Introduction

Airdesk is a collaborative platform. Find out how it works and what sets it apart.

## This page gives you an overview of Airdesk and its features.

{% hint style="info" %}
Airdesk is a collaborative accountability platform.
{% endhint %}

{% hint style="info" %}
You can also consult this playlist to learn more about the platform.
{% endhint %}

* [**Access the platform**](/introduction#access-airdesk)&#x20;
* [**Accountability** ](/introduction#accountability)
* [**Organizational Hierarchy** ](/introduction#organizational-hierarchy)
* [**Service Hierarchy** ](/introduction#service-hierarchy)

## Access Airdesk&#x20;

&#x20;To access Airdesk visit [**https://app.airdesk.ai**](https://app.airdesk.ai/)&#x20;

## Accountability&#x20;

Airdesk, unlike some collaborative platforms or working methods, is inspired by methods such as scrum and agile and promotes the assignment of **Tasks** or **Deals** to a user. Even when teams are seperated or working remotely, there is always someone assigned to continue the **Task/Deal**. &#x20;

To learn more about managing **Departments** and **Teams** visit the links below:&#x20;

{% content-ref url="/pages/-MMLFsVh5R47FB2RcGnn" %}
[Departments](/interface/administracao/espaco/departamentos)
{% endcontent-ref %}

{% content-ref url="/pages/-MMLFt1aO\_OH2t2ADMXX" %}
[Teams](/interface/administracao/espaco/equipas)
{% endcontent-ref %}

## Organizational Hierarchy&#x20;

```
Dashboard
└── Companies
    └── Departaments
        └── Teams
            └── Users
```

The dashboard or workspace is composed of everything you need to work smarter. All the information that will be generated and managed, will be associated to it. A workspace may include one or several **companies** (unlike other platforms, Airdesk allows to configure several companies). Usually, this decision should be made with the support of a **certified** partner. This partner can advise you or create several **workspaces or a workspace** with multiple companies.

{% hint style="info" %}
For companies that regularly work on projects together, we suggest that they configure a multi-company workspace. This way, all task and time registration data can be centralized.
{% endhint %}

Departments must assign an employee as supervisor. They will be able to visualize everything at a department level but will not be able to access information from a company of which they are not a part of. &#x20;

The teams are part of departments. One of Airdesk advantages is the possibility for an employee, who is part of a team, to view the tasks assigned to another colleague in the same team, if permissions allow it.&#x20;

{% hint style="warning" %}
Airdesk permissions are very versatile and can be quite complex. It's important to find out how the permissions work.
{% endhint %}

{% content-ref url="/pages/-MMLweVef4jNjoHj7yAm" %}
[Permissions](/interface/administracao/espaco/utilizadores/permissions)
{% endcontent-ref %}

## Service Hierarchy&#x20;

Airdesk consists of a hierarchy of services that allows greater versatility, keeping all the information organized.&#x20;

We list below all the areas that Airdesk covers:&#x20;

| Contacts | Sales          | Servicess |
| -------- | -------------- | --------- |
| Accounts | Deals          | Calls     |
| Contacts | Contracts      | Cases     |
|          | Subscriptions  | Projects  |
|          | Classification | Tasks     |
|          | Billing        | Time      |

One of Airdesk's biggest advantages is for individual users and teams to be able to work with any area mentioned above, without having to implement the others.

{% hint style="warning" %}
The only required modules in Airdesk are **Accounts** and **Contacts**.&#x20;
{% endhint %}

Each area has a purpose, and a working method that should be implemented. It's important to understand the rules and requirements of each module before implementation.  \
The hierarchy of services may seem complex when all areas are implemented, example of a hierarchy:&#x20;

```
Account
└── Contact
    └── Call
    └── Deal
        └── Project
            └── Case
                └── Task
                    └── Time
```

In the table below you can learn more about each area:

| Areas             | Description                                                                                                                                                                                                                                   |
| ----------------- | --------------------------------------------------------------------------------------------------------------------------------------------------------------------------------------------------------------------------------------------- |
| **Accounts**      | Management of external entities including clients, partners, distributors, or suppliers.                                                                                                                                                      |
| **Contacts**      | Management of contacts of external entities.                                                                                                                                                                                                  |
| **Deals**         | Creation and management of deals or possible deals.                                                                                                                                                                                           |
| **Contracts**     | Creation and management of annual, monthly, or quarterly contracts with the possibility of billing the hours spent, and work done.                                                                                                            |
| **Subscriptions** | Creation and management of any type of renewal, be it annual, quarterly, or weekly. Examples of renewals: domains, certificates, cleaning, shopping, others.                                                                                  |
| **Calls**         | More directed to call centers, this area allows users to register all incoming or outgoing calls.                                                                                                                                             |
| **Projects**      | Management of any type of project including construction, design, programming, or others. Manage time and delivery dates.                                                                                                                     |
| **Cases**         | Creation and management of cases. In a company, there are usually cases that need to be handled or resolved by several employees or departments. The case system allows users to create a case, categorize it, and assign it to another user. |
| **Tasks**         | Creation and management of tasks. For both the BackOffice team and the team on the field, it's possible to manage and assign tasks, allowing users to access their daily schedules easily.                                                    |
| **Time**          | The time record, also called worksheet record, allows users to record their daily work. Only with this feature is it possible to track billable hours, both in contracts and projects.                                                        |


# Overview

{% content-ref url="/pages/-MMH2m4To3q3WLY\_w1o2" %}
[Navigation](/interface/overview/untitled)
{% endcontent-ref %}

{% content-ref url="/pages/-MMKQs-OI3qlJD79gvJC" %}
[Filters](/interface/overview/filters)
{% endcontent-ref %}

{% content-ref url="/pages/-MMKSc5bA1HpqkXe3u3d" %}
[Summary](/interface/overview/summary)
{% endcontent-ref %}

{% content-ref url="/pages/-MMKT3PN3D1my5jv1hCf" %}
[Menu (+) and (---)](/interface/overview/menu-+-and)
{% endcontent-ref %}

{% content-ref url="/pages/-MMKVZ4asKWCvceFxG3Y" %}
[Views](/interface/overview/views)
{% endcontent-ref %}


# Navigation

Introduction to Airdesk's interface.

The interface is composed by:&#x20;

1. [**Main Menu**](/interface/overview/untitled#main-menu)&#x20;
2. [**Utility Menu** ](/interface/overview/untitled#utility-menu)

## Main Menu&#x20;

In the main menu, you can find the following Airdesk features:

![](https://4075187781-files.gitbook.io/~/files/v0/b/gitbook-legacy-files/o/assets%2F-MMGy7hswNWyyiXACRWv%2F-MUEsB4ag4PApaPLIyQm%2F-MUEtk2TxdmCHUKg7yjA%2Fimage.png?alt=media\&token=b62ff215-74a7-4786-baab-db02e7a4deea)

| Select             | Feature                                                                                                                                                                                                               |
| ------------------ | --------------------------------------------------------------------------------------------------------------------------------------------------------------------------------------------------------------------- |
| Logo               | When selecting the logo, you will be directed to Airdesk's home page, the Dashboard.                                                                                                                                  |
| Favorites          | Clicking on the icon will display the sidebar with the list of favorites chosen by the user.                                                                                                                          |
| Menus and Submenus | On the right side of the logo, you will find the menus which you have permission to access. If you can't view a specific module, you should contact your administrator so that they can give you the access you need. |

## Utility Menu

In the main menu, you can find the following Airdesk features:

![](https://4075187781-files.gitbook.io/~/files/v0/b/gitbook-legacy-files/o/assets%2F-MMGy7hswNWyyiXACRWv%2F-MUEsB4ag4PApaPLIyQm%2F-MUEtnyfGYsP3-yFYZvl%2Fimage.png?alt=media\&token=2c045276-40a3-4682-850c-84e83c62b78f)

| Select      | Feature                                                                                                                                            |
| ----------- | -------------------------------------------------------------------------------------------------------------------------------------------------- |
| +           | The "+" icon is a shortcut that is always available, allowing you to add any content (that you have permission). The F2 shortcut can also be used. |
| Omni-Search | The search allows you to quickly search for any data on Airdesk. The F1 shortcut can also be used.                                                 |
| Chronometer | The chronometer allows users to use one or more chronometers. This data can then be converted into a time record.                                  |
| Alerts      | Airdesk alerts appear in this area, listed from newest to oldest.                                                                                  |
| Activity    | Shortcut for all activity in Airdesk's. If you made a mistake, please review your last change.                                                     |
| Inbox       | Direct access to the Airdesk inbox, where you can check incoming e-mails and exchanged messages.                                                   |
| Exports     | Quick access to the list of exports made in the app, sorted from newest to oldest.                                                                 |
| Settings    | Access to Airdesk's configurations area.                                                                                                           |
| User        | Access to Help menus, Profile, Feedback and other menus.                                                                                           |


# Filters

Filters allow you to access information quickly.

There are several ways to search information in Airdesk.  It's very important for users to explore the multiple ways of filtering and searching.  \
You can see below an example of **Filters** in the **Deals** area:&#x20;

<div align="left"><img src="https://4075187781-files.gitbook.io/~/files/v0/b/gitbook-legacy-files/o/assets%2F-MMGy7hswNWyyiXACRWv%2F-MW4-78xvAnnpFw0Ej6q%2F-MW40KBuRYweB1vbloxr%2Foverview_filters.png?alt=media&amp;token=3d143753-e5b1-410f-9fee-cbf493092977" alt=""></div>

There are several concepts that you should be familiar with:

| Title           | Description                                                                                                                                                                                                                                                                             |
| --------------- | --------------------------------------------------------------------------------------------------------------------------------------------------------------------------------------------------------------------------------------------------------------------------------------- |
| Pipeline        | In Airdesk, there is the concept of Pipeline. In this area, you can select which pipeline you want to view. If you only work with one, the field is disabled. This is not compatible with all views.                                                                                    |
| Filter          | The filter is different depending on the view and the type of content that is being worked on. One of the advantages of Airdesk is that the filter is applied to the URL/LINK of the Browser, that is, it can be shared by email or chat with colleagues or even be saved in favorites. |
| Advanced Filter | The advanced filter requires greater dedication and is usually used for complex combinations and situations that users want to re-use constantly.                                                                                                                                       |
| Color           |                                                                                                                                                                                                                                                                                         |
| Ordering        | You can combine up to 3 sequences and also sort data in ascending or descending order.                                                                                                                                                                                                  |
| Group (β)       | This feature allows the grouping of information. It only works with the list view.                                                                                                                                                                                                      |
| Restore All     | Airdesk restores the views by default to: Assigned to ME in Active state.                                                                                                                                                                                                               |
| Remove All      | When you need to view all the information, it's faster to click on this button to remove every filter.                                                                                                                                                                                  |

### Simple Filters

The first tool, "**Filter**", provides basic elements such as:

* Account&#x20;
* Active notifications&#x20;
* Assigned to&#x20;
* Company&#x20;
* Created by&#x20;
* Department&#x20;
* End date&#x20;
* Inactive notifications&#x20;
* Manager&#x20;
* Name
* Nº&#x20;
* OPV&#x20;
* Pipeline status&#x20;
* Read&#x20;
* Start date&#x20;
* Status&#x20;
* Team&#x20;
* Unread&#x20;
* Value

For some elements that users wish to filter, they are given the following conditions:

* Is equal to,  &#x20;
* Is different from  &#x20;
* Is less than  &#x20;
* Is less than or equal to  &#x20;
* is more than  &#x20;
* is more than, or equal to  &#x20;
* starts with  &#x20;
* ends with  &#x20;
* contains  &#x20;
* does not contain  &#x20;
* is empty  &#x20;
* is not empty&#x20;

### Advanced Filters

The "**Advanced Filters**" tool allows the user to create and share filters using the "and" and "or" operators, combined with other filters.&#x20;

By clicking on Advanced Filter, you'll initially see: "Show all", "Search" and "Create advanced filter".&#x20;

By clicking on "**Create advanced filter**", a slider opens on the right side of the screen with the following fields to fill in:&#x20;

* **Filter name**&#x20;
* **Public option** - for the filter to be available to all workspace users&#x20;
* **Users field** - for selected users&#x20;


# Summary

When you hover your mouse over a field, a summary is displayed.

One of Airdesk's most versatile features is the fact that you can see a quick summary when you hover the mouse over a field.

For example, if you hover the cursor over the name of a company:

![](https://4075187781-files.gitbook.io/~/files/v0/b/gitbook-legacy-files/o/assets%2F-MMGy7hswNWyyiXACRWv%2F-MUEsB4ag4PApaPLIyQm%2F-MUEu0XwjXTnswxguyQ2%2Fimage.png?alt=media\&token=30257455-f7bd-448b-ab40-05b67ace165a)

The client's summary will appear:&#x20;

* Name and Number&#x20;
* Customer status&#x20;
* Contacts&#x20;
* Associated Contracts&#x20;
* Associated Projects&#x20;

This feature allows you to have an overview of the client, without having to leave the page.&#x20;


# Menu (+) and (---)

There are two Airdesk context menus.

In Airdesk, you'll find two context menus:&#x20;

1. [**Service Menu (+)** ](/interface/overview/menu-+-and#service-menu)
2. &#x20;[**View Menu (•••)**](/interface/overview/menu-+-and#view-menu)

## Service Menu&#x20;

Normally, this menu can be found at the level of the various services. For example, in the **contract list view**, you can find an icon at the beginning of the list at the contract level. &#x20;

By selecting the menu, you can see the following options:&#x20;

![](https://4075187781-files.gitbook.io/~/files/v0/b/gitbook-legacy-files/o/assets%2F-MMGy7hswNWyyiXACRWv%2F-MUEsB4ag4PApaPLIyQm%2F-MUEu593EHo4c6b8ydpi%2Fimage.png?alt=media\&token=adfad793-1c11-4456-aa90-12c47bd71cb8)

| Menu name    | Description                                                           |
| ------------ | --------------------------------------------------------------------- |
| Details      |                                                                       |
| View 360     |                                                                       |
| Add call     | Shortcut to create a call associated with the contract.               |
| Add case     | Shortcut to create a case associated with the contract.               |
| Add task     | Shortcut to create a task associated with the contract.               |
| Add time     | Shortcut to create a time record associated with the contract.        |
| Edit         |                                                                       |
| Duplicate    | Duplicate the contract and present it in the creation form.           |
| Export PDF   | Export the contract to PDF \[1].                                      |
| Export XLS   | Export the contract to XLS \[1].                                      |
| Email report | Send the attached report to the customer \[1].                        |
| Copy link    | Copy the link from the contract to the clipboard so you can share it. |
| Delete       |                                                                       |

{% hint style="info" %}
\[1]: when selecting an export option, you can select the following options:
{% endhint %}

<div align="left"><img src="https://4075187781-files.gitbook.io/~/files/v0/b/gitbook-legacy-files/o/assets%2F-MMGy7hswNWyyiXACRWv%2F-MUEsB4ag4PApaPLIyQm%2F-MUEu7ogbVNRRdyG6B-h%2Fimage.png?alt=media&amp;token=7cc1ba87-ee9e-47c3-8a22-9480487fcdb3" alt=""></div>

| Option                                      | Description                                                                                 |
| ------------------------------------------- | ------------------------------------------------------------------------------------------- |
| Date to send                                | Select the date range to include in the report.                                             |
| **Time record to include:**                 |                                                                                             |
| Not classified                              | Include unclassified time records.                                                          |
| Classified                                  | Include classified time records.                                                            |
| Invoiced                                    | Include invoiced time records.                                                              |
| Associated but classified to another entity | Include time records classified to multiple companies. If several companies are configured. |

## View Menu

The menu can be found in the view option bar:

![](https://4075187781-files.gitbook.io/~/files/v0/b/gitbook-legacy-files/o/assets%2F-MMGy7hswNWyyiXACRWv%2F-MUEsB4ag4PApaPLIyQm%2F-MUEuAcB_6l5qddfZK1e%2Fimage.png?alt=media\&token=6632b7e4-330c-4642-ba08-9a5cf26874ca)

When opening the view options menu, you can find some of these features:

<div align="left"><img src="https://4075187781-files.gitbook.io/~/files/v0/b/gitbook-legacy-files/o/assets%2F-MMGy7hswNWyyiXACRWv%2F-MUEsB4ag4PApaPLIyQm%2F-MUEuCVHR2QMFlwjvI_X%2Fimage.png?alt=media&amp;token=ed91e6f7-b5f9-4bee-a4f0-f272ca17aadd" alt=""></div>

| Option                     | Description                                        |
| -------------------------- | -------------------------------------------------- |
| Export everything to Excel | Export all data included in the filter.            |
| Export page to Excel       | Export only currently visible data.                |
| Edit Columns               | Edit the grid columns.                             |
| Restore Columns            | Restore only the columns seen.                     |
| Restore Everything         | Restore sorting, columns, column sizes and others. |


# Views

There are several options to view the same data in Airdesk.

{% hint style="warning" %}
Depending on the menu and the type of content, one or more views may not be available.&#x20;
{% endhint %}

Each Airdesk view was created for a specific purpose, with specific features. Below is a list of available views:&#x20;

* [**List**](/interface/overview/views#lista-grid)
* [**Calendar**](/interface/overview/views#calendario-timeline)
* [**Timeline** ](/interface/overview/views#calendario-timeline-1)
* [**Kanban**](/interface/overview/views#colunas-kanban)
* [**Cards**](#cards)

## List <a href="#lista-grid" id="lista-grid"></a>

{% hint style="info" %}
Airdesk's default view&#x20;
{% endhint %}

The view is composed of columns, similar to a spreadsheet. It allows you to change the size of the columns and reorder when selecting the column.&#x20;

![](https://4075187781-files.gitbook.io/~/files/v0/b/gitbook-legacy-files/o/assets%2F-MMGy7hswNWyyiXACRWv%2F-MUEuHwDOwlDc4_395eN%2F-MUEvc0qbiThDWH6dN4b%2Fimage.png?alt=media\&token=b36d3708-2247-466c-a7da-630271a60ecd)

By using the view context menu, you can configure which columns you want to view or hide. When selecting the "edit columns" option, the following menu is displayed:

![](https://4075187781-files.gitbook.io/~/files/v0/b/gitbook-legacy-files/o/assets%2F-MMGy7hswNWyyiXACRWv%2F-MW46NE5bQS9E6DpGuNI%2F-MW4BZjm0h6twkmcU9kn%2Foverview_views_list_edit_column.png?alt=media\&token=e10aba49-154d-4642-83dc-6e62fabcf56c)

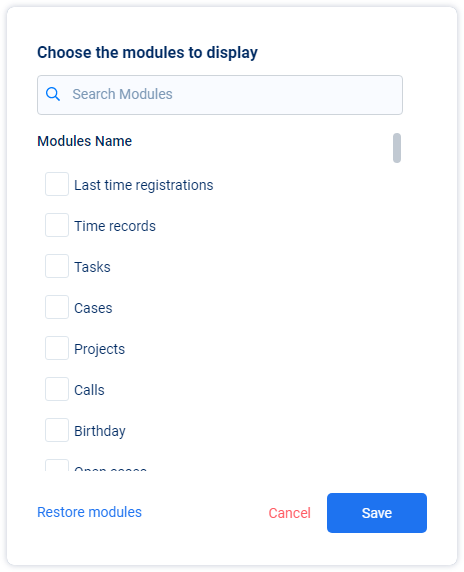
In the left side column, you can select which columns you want to keep or hide. In the right-side column, the order of the columns is displayed. It's possible to reorder them or even remove them. There is also a shortcut to restore the columns.

### Pagination

By default, Airdesk displays 50 pages in the results, you should try to keep this value as the default option so that your work performance is the best. When increasing this number, you'll have to wait for the system to load all the data.

<div align="left"><img src="https://4075187781-files.gitbook.io/~/files/v0/b/gitbook-x-prod.appspot.com/o/spaces%2F-MMGy7hswNWyyiXACRWv%2Fuploads%2FVX7R5fvqH1DN0e3ZjS1P%2Foverview_views_list_paging.png?alt=media&amp;token=dd10d368-6b2d-4ae5-a137-0ca925f1cf1b" alt=""></div>

Features available in the paging bar:

| Name   | Feature                              |
| ------ | ------------------------------------ |
| \|◀    | Jump to the homepage.                |
| ◀      | Go back one page.                    |
| \[1-9] | Jump to a specific page.             |
| ▶      | One page forward.                    |
| ▶\|    | Jump to the last page.               |
| 50 🔽  | Select a specific number of results. |

Extra features available:

<div align="left"><img src="https://4075187781-files.gitbook.io/~/files/v0/b/gitbook-legacy-files/o/assets%2F-MMGy7hswNWyyiXACRWv%2F-MUEuHwDOwlDc4_395eN%2F-MUEvhxMlJlLbSlCYNTO%2Fimage.png?alt=media&amp;token=690c96ee-75a4-42ab-bf6b-3d3e8324e10f" alt=""></div>

| Name   | Feature                            |
| ------ | ---------------------------------- |
| 1 - 50 | The result number you are viewing. |
| 1547   | Total number of results.           |
| 🔁     | Update view.                       |

## Calendar <a href="#calendario-timeline" id="calendario-timeline"></a>

Ideal view to visualize, over time, the assignment of projects or tasks.

![](https://4075187781-files.gitbook.io/~/files/v0/b/gitbook-legacy-files/o/assets%2F-MMGy7hswNWyyiXACRWv%2F-MUEuHwDOwlDc4_395eN%2F-MUEvsFgznOkDgVXVcb0%2Fimage.png?alt=media\&token=5c0938a6-fad2-490a-9515-8f18f1260aed)

In this view, you can find customization tools in the bottom right corner:

| Name    | Description                                                                  |
| ------- | ---------------------------------------------------------------------------- |
| 🔍-     | Select the magnifying glass with - (minus) symbol to reduce the zoom level.  |
| 🔍 +    | Select the magnifying glass with + (plus) symbol to increase the zoom level. |
| Monthly | Change column size to **Month** / Day.                                       |
| Annual  | Change column size to **Year** / Month.                                      |
| Today   | Shortcut to re-center the calendar to today.                                 |

## Timeline <a href="#calendario-timeline" id="calendario-timeline"></a>

There are some features that allow you to manipulate tasks or projects in a very simple way, such as:

![](https://4075187781-files.gitbook.io/~/files/v0/b/gitbook-legacy-files/o/assets%2F-MMGy7hswNWyyiXACRWv%2F-MUEuHwDOwlDc4_395eN%2F-MUEvwcJDicoysqEhH3n%2Fimage.png?alt=media\&token=9caf792f-1bd9-4e1e-975d-b18cf7d9e1b8)

| Name                 | Description                                                                                                                               |
| -------------------- | ----------------------------------------------------------------------------------------------------------------------------------------- |
| Side bars            | Select and drag to change the start and end day (times will not be changed).                                                              |
| Move Task or Project | Hover the cursor over it and wait 2 seconds. Then you can drag so that you can move from one day to the next (the hours will not change). |
| Move Calendar        | You can select an empty space and drag to move the calendar.                                                                              |

## Kanban <a href="#colunas-kanban" id="colunas-kanban"></a>

This view is ideal for managing daily work. It's composed by vertical columns that can have personalized names (pipeline / pipeline stages).

![](https://4075187781-files.gitbook.io/~/files/v0/b/gitbook-legacy-files/o/assets%2F-MMGy7hswNWyyiXACRWv%2F-MUEuHwDOwlDc4_395eN%2F-MUEvq4svQgLdhzddtR1%2Fimage.png?alt=media\&token=5741fe83-9708-495d-b134-a41a1c5b65a9)

In this view, you can drag from one column to another in order to change the status.

## Cards

With this feature, teams can better view the progress of tasks, cases, projects in a card format.

![](https://4075187781-files.gitbook.io/~/files/v0/b/gitbook-x-prod.appspot.com/o/spaces%2F-MMGy7hswNWyyiXACRWv%2Fuploads%2FrEABR1lHaLtqeXwQsn0D%2FGrupo%2017187.png?alt=media\&token=0699816e-5cfe-4662-8b83-a6a1d04ab382)


# Favorites

Quick access to the functions you use most.

In the Favorites list, the user can create shortcuts to any of the Airdesk functions or to specific records, such as an account, a business, a project, among others. You can organize the various links as you like, in a list or in folders.

![](https://4075187781-files.gitbook.io/~/files/v0/b/gitbook-x-prod.appspot.com/o/spaces%2F-MMGy7hswNWyyiXACRWv%2Fuploads%2FQW2qTXMdwy2UAjo0cwHy%2Ffavorites%201.png?alt=media\&token=4ea6717e-677c-4def-b9a7-495da0b980f9)

![](https://4075187781-files.gitbook.io/~/files/v0/b/gitbook-x-prod.appspot.com/o/spaces%2F-MMGy7hswNWyyiXACRWv%2Fuploads%2FNcxgJDlZOyYfeI27gTKe%2Ffavorites%202.png?alt=media\&token=c6d5b2f6-8524-4dde-99ca-14f88a26933a)


# Authentication

Learn how to access Airdesk.

## Access Airdesk&#x20;

To access Airdesk visit [**https://app.airdesk.ai**](https://app.airdesk.ai/)&#x20;

![](https://4075187781-files.gitbook.io/~/files/v0/b/gitbook-legacy-files/o/assets%2F-MMGy7hswNWyyiXACRWv%2F-MUEw4Jd0kaZsQPvkOMU%2F-MUEwoHhm7zuPfvVCbNB%2Fimage.png?alt=media\&token=9a247f1c-34db-4e55-b527-690cf12f8dd6)

## Compatibility&#x20;

Airdesk is optimized for Browsers that use Chromium as an engine, so we suggest you use one of the following:&#x20;

* **Google Chrome**&#x20;
* &#x20;**Edge Chromium 2020**&#x20;
* &#x20;**Vivaldi**&#x20;

Although not optimized for Firefox, it works almost perfectly, but some more complex and advanced features may have a different performance. Please, if you detect an inconsistency, report it using the link below:&#x20;

{% content-ref url="/pages/-MMKcnB99NoDKVBe5c-t" %}
[Help / Support](/help-support/how-to-ask-for-help)
{% endcontent-ref %}

## How do I get access?

You can only access Airdesk after you have received an invitation to access. After receiving an invitation, you can select a password.&#x20;

{% hint style="info" %}
If you want to get access to a new space, you should contact us through [**https://www.airdesk.ai**](https://www.airdesk.ai/)&#x20;
{% endhint %}


# Reset Password

Can't access it? Restore your account.

## How do I reset it?&#x20;

Airdesk allows you to restore your account if you can't remember your password, visit [**https://app.airdesk.ai/recovery**](https://app.airdesk.ai/recovery) and fill in your details so you can start the password restoration process.

![](https://4075187781-files.gitbook.io/~/files/v0/b/gitbook-legacy-files/o/assets%2F-MMGy7hswNWyyiXACRWv%2F-MUEx1OVbN8_E2lf_Oe4%2F-MUExE37NHk3bcNZDYIJ%2Fimage.png?alt=media\&token=c957df26-c2ca-4490-9389-61871d5aaf72)

After submitting your data, you will receive an email with a link so you can restore your account. After selecting the link in the email, you can select a new password.

## I still have problems

If you continue to have problems, please contact our support team

{% content-ref url="/pages/-MMKcnB99NoDKVBe5c-t" %}
[Help / Support](/help-support/how-to-ask-for-help)
{% endcontent-ref %}


# User

{% content-ref url="/pages/-MMKbL5eYMSoN\_aR6tHH" %}
[Edit Profile](/interface/user/edit-profile)
{% endcontent-ref %}

{% content-ref url="/pages/-MMKbo3nTAAXHHqHXWnn" %}
[Reset Password](/interface/authentication/reset-password)
{% endcontent-ref %}

{% content-ref url="/pages/-MMKdaSuFc5TjsZYjWwj" %}
[Activity](/interface/user/history)
{% endcontent-ref %}

{% content-ref url="/pages/-MMKdu68MIkGwzSyRxAB" %}
[Notifications](/interface/user/alerts-notifications)
{% endcontent-ref %}

{% content-ref url="/pages/-MMKhlEFglX6SxXdRFUD" %}
[Add](/interface/user/add)
{% endcontent-ref %}

{% content-ref url="/pages/-MMKi0Jb2NojwuLv\_Pwo" %}
[Search](/interface/user/search)
{% endcontent-ref %}


# Add

In the user menu, this icon, when selected, will display the options to add:

![](https://4075187781-files.gitbook.io/~/files/v0/b/gitbook-x-prod.appspot.com/o/spaces%2F-MMGy7hswNWyyiXACRWv%2Fuploads%2FkxO9TAdgqmq2X9xCxTxu%2FNavbar%20Horizontal%20Adicionar.png?alt=media\&token=0150b1a0-b225-4043-a3c9-598025b0fe89)

The available options will be presented according to the permissions you are given:

![](https://4075187781-files.gitbook.io/~/files/v0/b/gitbook-x-prod.appspot.com/o/spaces%2F-MMGy7hswNWyyiXACRWv%2Fuploads%2FArrQgzIAfEVmRWkQVo4B%2FPop%20Up%20Adicionar.png?alt=media\&token=f9514431-2bc7-4e8b-b61d-cce0900ed213)


# Search

Search for any area easily and quickly.

In Airdesk, there is the possibility to make a quick search to find out if the information you are looking for exists.

{% hint style="info" %}
This search does not use all possible fields.
{% endhint %}

To activate the quick search, select the magnifying glass on the top bar:

![](https://4075187781-files.gitbook.io/~/files/v0/b/gitbook-legacy-files/o/assets%2F-MMGy7hswNWyyiXACRWv%2F-MUEx1OVbN8_E2lf_Oe4%2F-MUEyhFKVAYy-V_icGgu%2Fimage.png?alt=media\&token=8f814e62-85f7-4ed9-8aad-96e17b43f2be)

There is a shortcut associated with this feature:

> F1

![](https://4075187781-files.gitbook.io/~/files/v0/b/gitbook-legacy-files/o/assets%2F-MMGy7hswNWyyiXACRWv%2F-MUEx1OVbN8_E2lf_Oe4%2F-MUEykQl66NBpRVQwyQN%2Fimage.png?alt=media\&token=f5db2a33-cbcd-4a65-8cbd-09f610c5eae1)


# Notifications

In the user menu, this icon, when selected, will display your notifications:

![](https://4075187781-files.gitbook.io/~/files/v0/b/gitbook-legacy-files/o/assets%2F-MMGy7hswNWyyiXACRWv%2F-MUEx1OVbN8_E2lf_Oe4%2F-MUEyVCsHLdDUFpy0ipw%2Fimage.png?alt=media\&token=64aa1dc5-6d02-4298-a177-b2da86f37379)

When you select it, you'll view the list of notifications from the newest to oldest, grouped by their notification date. Days without notifications will not be displayed. You can still filter:

![](https://4075187781-files.gitbook.io/~/files/v0/b/gitbook-legacy-files/o/assets%2F-MMGy7hswNWyyiXACRWv%2F-MUEx1OVbN8_E2lf_Oe4%2F-MUEyX0cmNUZoZSe20kc%2Fimage.png?alt=media\&token=31d4644a-e2e1-4bce-b373-76536ec8b7c7)

The alerts have two states: "**Read**" and "**Unread**". The "Unread" state is presented with a blue circle.

![](https://4075187781-files.gitbook.io/~/files/v0/b/gitbook-legacy-files/o/assets%2F-MMGy7hswNWyyiXACRWv%2F-MUEx1OVbN8_E2lf_Oe4%2F-MUEyYbtN1glG-jM1vX2%2Fimage.png?alt=media\&token=af855517-79d2-4ff8-98cf-edf6d6c97a6e)

To mark it as read, you must select the notification.[<br>](https://docs.airdesk.ai/interface/utilitario/historico)


# Activity

In the utility menu, you'll find the "**Activity**" icon:

![](https://4075187781-files.gitbook.io/~/files/v0/b/gitbook-legacy-files/o/assets%2F-MMGy7hswNWyyiXACRWv%2F-MW4L8nAZ5z7nr4AV3xi%2F-MW55Q3XLLWEXL0AOKQp%2Fuser_history.png?alt=media\&token=f53ff64b-1018-4d06-bd99-5e73ed6b0f8c)

When selecting it, Airdesk will present data from newest to oldest, grouped by date. Airdesk will not display days with no activity. You can still filter:

![](https://4075187781-files.gitbook.io/~/files/v0/b/gitbook-legacy-files/o/assets%2F-MMGy7hswNWyyiXACRWv%2F-MUEx1OVbN8_E2lf_Oe4%2F-MUExIcTlAW8duZ1_vLl%2Fimage.png?alt=media\&token=11122fcf-15c9-4c04-b15c-7673f9896014)


# Edit Profile

Click on the Picture/Company and select "**Account and Profile**".

### Personal Data

![](https://4075187781-files.gitbook.io/~/files/v0/b/gitbook-legacy-files/o/assets%2F-MMGy7hswNWyyiXACRWv%2F-MUEx1OVbN8_E2lf_Oe4%2F-MUEx4x6hwv9GpfSf8wp%2Fimage.png?alt=media\&token=8928a530-58d2-412b-90cf-d329f67357ac)

Upload a photo on "upload photo", enter the Full Name in the respective field and the Date of Birth.&#x20;

### Address &#x20;

<div align="left"><img src="https://4075187781-files.gitbook.io/~/files/v0/b/gitbook-legacy-files/o/assets%2F-MMGy7hswNWyyiXACRWv%2F-MUEx1OVbN8_E2lf_Oe4%2F-MUEx7_lOq5Ohic_XJ2G%2Fimage.png?alt=media&amp;token=06ae0a4b-d962-4763-8d8a-74f164989deb" alt=""></div>

You have three alternatives to insert the Professional address: by writing or pasting the address with the possibility of including coordinates, via map or even by Geolocation.&#x20;

### Contacts &#x20;

![](https://4075187781-files.gitbook.io/~/files/v0/b/gitbook-legacy-files/o/assets%2F-MMGy7hswNWyyiXACRWv%2F-MUEx1OVbN8_E2lf_Oe4%2F-MUExASpsefud6-kImtF%2Fimage.png?alt=media\&token=f1edcba6-1998-4ab0-848a-278d03a5a7a2)

Enter a business phone number and Email.&#x20;


# Inbox

All messages in one space.

Integration of an inbox email system to automatically assign cases and tasks from forms, widgets and contacts. You can share announcements with the whole team, celebrate important achievements, and chat about multiple tasks and projects at the same time.

![](https://4075187781-files.gitbook.io/~/files/v0/b/gitbook-x-prod.appspot.com/o/spaces%2F-MMGy7hswNWyyiXACRWv%2Fuploads%2F4Cw15hMpMV9WBK37mdVS%2Finbox%201.png?alt=media\&token=f8b0f818-5e6b-428b-81f9-4c47f02cd283)

### Shared Inbox

Your inbox can help you coordinate everything you are working on. This is especially important if your team is working remotely or permanently distributed.

### 360° view

![](https://4075187781-files.gitbook.io/~/files/v0/b/gitbook-x-prod.appspot.com/o/spaces%2F-MMGy7hswNWyyiXACRWv%2Fuploads%2FErfRog3OZJzECs6s3CKm%2FVis%C3%A3o%20360%20email.png?alt=media\&token=ab802387-baf3-4185-831c-472d114766aa)

When you select an email or message in Inbox, you can see on the right side of the screen the 360 view of the conversation, where you can see the account, contact and records associated directly with that message.


# Dashboards

All your data in one place.

&#x20;Airdesk has default Dashboards available, but you can also customize them.

* [**Default Dashboards**](/interface/dashboards#dashboards-por-defeito)&#x20;
* [**Dashboard setup** ](/interface/dashboards#como-configurar-o-dashboard)
* [**Customized Dashboard**](/interface/dashboards#v-dashboard-personalizado)

## Default Dashboards <a href="#dashboards-por-defeito" id="dashboards-por-defeito"></a>

Airdesk provides the following dashboards:&#x20;

1. **Personal**
2. **Cases**
3. **Tasks**&#x20;
4. **Projects**
5. **Contracts**&#x20;
6. **Deals**
7. **Customized**

![](https://4075187781-files.gitbook.io/~/files/v0/b/gitbook-legacy-files/o/assets%2F-MMGy7hswNWyyiXACRWv%2F-MUEx1OVbN8_E2lf_Oe4%2F-MUEyoGhMTZAWWesoqyA%2Fimage.png?alt=media\&token=8213d170-15d1-41fc-a9b6-cf6dca557d8b)

## How to configure the Dashboard <a href="#como-configurar-o-dashboard" id="como-configurar-o-dashboard"></a>

There are some features available on dashboards. One is sorting. To do this, just select and press the block so you can move it. The second feature is the possibility to **scale** the blocks. For this, you must select the lower right corner of each block. Finally, in the upper right corner, you'll find a button with 3 circles. In this one, you can select "configure dashboard" where you can choose which blocks to **hide or show**.

<div align="left"><img src="https://4075187781-files.gitbook.io/~/files/v0/b/gitbook-legacy-files/o/assets%2F-MMGy7hswNWyyiXACRWv%2F-MUEx1OVbN8_E2lf_Oe4%2F-MUEypeDesU4pHexlKJG%2Fimage.png?alt=media&amp;token=e44f5f05-712c-4d8f-b798-f09b94130696" alt=""></div>

## Customized Dashboard <a href="#v-dashboard-personalizado" id="v-dashboard-personalizado"></a>

You can create a custom dashboard with any type of information you have access to. To create a custom dashboard, select the menu's custom Dashboard.

![](https://4075187781-files.gitbook.io/~/files/v0/b/gitbook-legacy-files/o/assets%2F-MMGy7hswNWyyiXACRWv%2F-MUEx1OVbN8_E2lf_Oe4%2F-MUEys1MmBadSs0oZpKX%2Fimage.png?alt=media\&token=1ec7b546-ad83-4ce2-a74f-b5f5793ec3cf)


# Contacts

Manage your contacts in Airdesk.

In this section, we will discuss how to create and manage your contact in Airdesk.

![](https://4075187781-files.gitbook.io/~/files/v0/b/gitbook-legacy-files/o/assets%2F-MMGy7hswNWyyiXACRWv%2F-MMKmd7psyCgsDA157MI%2F-MMKo451KoLq3YsEn7iD%2Fimage.png?alt=media\&token=72a0b1fb-8121-4f20-993b-88dc8c351a33)


# Accounts

Accounts are customers or organizations.

{% hint style="info" %}
Before you can take advantage of the Airdesk, the first step is to create accounts and them the [**contacts**](/interface/contacts/contacts). You can create them as new contacts appear, but we suggest that, if you already have them, you create them before inviting other members of the company.
{% endhint %}

### How to create an account

Click on the top right corner in "Contacts" and select "Accounts" in the menu.

![](https://4075187781-files.gitbook.io/~/files/v0/b/gitbook-legacy-files/o/assets%2F-MMGy7hswNWyyiXACRWv%2F-MUEx1OVbN8_E2lf_Oe4%2F-MUEyx7ingGNVbCdabgn%2Fimage.png?alt=media\&token=cf66e052-d6e3-4a8e-83c1-aa63baa0889e)

| Field Name  | Description                                                                                                                                                 |
| ----------- | ----------------------------------------------------------------------------------------------------------------------------------------------------------- |
| Avatar      | Image that identifies the account in Airdesk.                                                                                                               |
| Name        | Name of the account.                                                                                                                                        |
| Status      | The status of the account: Active, Inactive, In Approval, Blocked.                                                                                          |
| Type        | To use this field, you must configure it in the administration panel. Segment the accounts by type, for example, Customer, Supplier, Partner, among others. |
| Location    | The location field allows to define the country, address, city and geo-referencing.                                                                         |
| Contacts    | Company contacts.                                                                                                                                           |
| VAT Number  | VAT Number is a field that has a validation feature in the Cloud. After adding the number, click the Icon to validate it.                                   |
| Domain      | It's the customer's website, examples: [www.airdesk.ai](http://www.airdesk.ai)                                                                              |
| Description | Free field for observations.                                                                                                                                |

### 360° view

With the 360 View you can see all activity originating from each account, business, project or case in a single place. This view ensures that all records associated with the principal will be listed and easily accessed.

![](https://4075187781-files.gitbook.io/~/files/v0/b/gitbook-x-prod.appspot.com/o/spaces%2F-MMGy7hswNWyyiXACRWv%2Fuploads%2Fg0HVYFZaeGc6yeKDHV9v%2F360%20view%20contas.png?alt=media\&token=f0c8bd69-d6ef-457e-82ee-892f6cabbefd)


# Contacts

Contacts are people.

{% hint style="info" %}
Before you can take advantage of Airdesk, the first step is to create [**accounts**](/interface/contacts/customers) and them the contacts. You can create them as new contacts appear, but we suggest that, if you already have them, you create them before inviting other members of the company.
{% endhint %}

## How to create a contact

Click on the top right corner on "Contacts" and select "Contacts" on the menu.

![](https://4075187781-files.gitbook.io/~/files/v0/b/gitbook-legacy-files/o/assets%2F-MMGy7hswNWyyiXACRWv%2F-MUEx1OVbN8_E2lf_Oe4%2F-MUEz0LkeNNWOyniZoDg%2Fimage.png?alt=media\&token=de41ae07-585e-4ad1-aafd-fa7233441be6)

| Name                                        | Description                                                                                                                                                                                                                                                                 |
| ------------------------------------------- | --------------------------------------------------------------------------------------------------------------------------------------------------------------------------------------------------------------------------------------------------------------------------- |
| Account                                     | You should associate the contact with one or more accounts.                                                                                                                                                                                                                 |
| Avatar                                      | Image that identifies the contact in Airdesk.                                                                                                                                                                                                                               |
| Name                                        | Name of the contact, you should insert the first and last name.                                                                                                                                                                                                             |
| Phone                                       | In order to normalize all the prefixes, this field is divided in two.                                                                                                                                                                                                       |
| Email                                       | Name of the contact.                                                                                                                                                                                                                                                        |
| Mobile                                      | In order to normalize all the prefixes, this field is divided in two.                                                                                                                                                                                                       |
| Notes                                       | Free field for observations.                                                                                                                                                                                                                                                |
| State                                       | The accounts status: Active, Inactive.                                                                                                                                                                                                                                      |
| Legal basis for processing a contact's data | <p><strong>Options available:</strong> </p><p>Legitimate interest - possible / potential. </p><p>Legitimate interest - existing client. </p><p>Legitimate interest - other. </p><p>Execution of a contract. </p><p>Consent given by the contact. </p><p>Not applicable.</p> |


# Import

How to import contacts and customers to Airdesk.

{% hint style="info" %}
You can find a pre-designed template to help you import[ **here**](https://www.airdesk.ai/wp-content/uploads/2020/06/Template-Excel-Importacao.xlsx).&#x20;
{% endhint %}

## Import contacts and clients <a href="#importar-contactos-e-clientes" id="importar-contactos-e-clientes"></a>

You can import files into Airdesk in order to create contacts and clients.&#x20;

{% hint style="danger" %}
Please note that importing is an advanced feature.&#x20;
{% endhint %}

### Before you start <a href="#antes-de-comecar" id="antes-de-comecar"></a>

Before you start an import, learn how to configure your import file to confirm that you have all the required fields for your import type.&#x20;

These are the following ways to import:&#x20;

* [**1 file with only 1 type (contact or client)** ](/interface/contacts/import#importar-1-ficheiro-com-1-tipo-contacto-ou-cliente)
* [**1 file with 2 types or 2 files with 1 type (contact and client)**](/interface/contacts/import#1-ficheiro-com-2-tipos-ou-2-ficheiros-com-1-tipo-contacto-e-cliente)&#x20;

{% hint style="info" %}
We suggest that you test the import with only 1 title line and one data line before proceeding with the complete import.&#x20;
{% endhint %}

## Import 1 file with 1 type (contact or client) <a href="#importar-1-ficheiro-com-1-tipo-contacto-ou-cliente" id="importar-1-ficheiro-com-1-tipo-contacto-ou-cliente"></a>

Follow these steps when your file contains only one type (for example, the file contains only contacts).

* Make sure your import file is already configured correctly. &#x20;
* In your Airdesk account, navigate to your contacts or clients.&#x20;
* In the top right corner, click the 3 points and then Import. &#x20;
* Click on Start an import.&#x20;

![](https://4075187781-files.gitbook.io/~/files/v0/b/gitbook-legacy-files/o/assets%2F-MMGy7hswNWyyiXACRWv%2F-MUJ2VcAwqBbO3dZknGy%2F-MUJ2i8zrEtfb7Mx05oU%2Fimage.png?alt=media\&token=95a201b7-08eb-4335-b8e8-076e1c8704b1)

* Select only 1 or 2 types you want to import.&#x20;
* Select the file you want to import.&#x20;

![](https://4075187781-files.gitbook.io/~/files/v0/b/gitbook-legacy-files/o/assets%2F-MMGy7hswNWyyiXACRWv%2F-MUJ2VcAwqBbO3dZknGy%2F-MUJ2kITG7fUU-VAMZLN%2Fimage.png?alt=media\&token=0e7923bd-fd74-4ba0-aea7-84c3163a22c7)

* Configure the necessary mapping columns. &#x20;

  Explanation of each column in the table below:&#x20;

![](https://4075187781-files.gitbook.io/~/files/v0/b/gitbook-legacy-files/o/assets%2F-MMGy7hswNWyyiXACRWv%2F-MUJ2VcAwqBbO3dZknGy%2F-MUJ2mCMaLdn7qFUH7Qx%2Fimage.png?alt=media\&token=e7884a39-ea85-4d7c-b8e9-d29d10eff9fc)

| Column name  | Description                                                                                                                                                                                                                                                                             |
| ------------ | --------------------------------------------------------------------------------------------------------------------------------------------------------------------------------------------------------------------------------------------------------------------------------------- |
| Coincides    | Validate if the column is already well mapped. Airdesk will automatically try to map properties according to the name of the columns in your file.                                                                                                                                      |
| Name         | Name of your file column. If your column is not appearing, there may be some inconsistency in the file or no value is filled in.                                                                                                                                                        |
| Examples     | Examples of values detected in your file.                                                                                                                                                                                                                                               |
| Property     | These are Airdesk's properties. You should map your column of the file with the fields you want to save. Some fields are required to import new records.                                                                                                                                |
| Overlap rule | <p>You must select from the options: </p><ul><li>Overlay existing data  </li><li>Overlap if value is empty </li><li>Do not overlap existing data</li></ul>                                                                                                                              |
| Duplicate    | When selected, Airdesk will admit several records with the same value, otherwise the line will not be imported. This option will have no effect on data overlapping.                                                                                                                    |
| Reference    | The reference is required if you want to update data from existing records. When selected, Airdesk will use this field as a comparison value to overlay the remaining mapped data (depending on the overlap rules). If no record with the value is found, a new record will be created. |

* Select the information field that the columns without properties will not be imported&#x20;
* Assign a name to the import&#x20;

![](https://4075187781-files.gitbook.io/~/files/v0/b/gitbook-legacy-files/o/assets%2F-MMGy7hswNWyyiXACRWv%2F-MUJ2VcAwqBbO3dZknGy%2F-MUJ2nv24V-KTSVaumJK%2Fimage.png?alt=media\&token=154c0373-c982-43f4-8c1b-24bd60ecbefc)

* Define the legal basis for data processing&#x20;
* To finish, submit the import&#x20;

The import process doesn't interfere with the use of Airdesk. The import processes with many fields and several column validations make the process take longer. In the import list, you can follow the import process.

In the import list, you can follow and check all imports. You should assign different names to the imports so that you can distinguish them.

![](https://4075187781-files.gitbook.io/~/files/v0/b/gitbook-legacy-files/o/assets%2F-MMGy7hswNWyyiXACRWv%2F-MUJ2VcAwqBbO3dZknGy%2F-MUJ2pk2pcSuBYfuQQ8m%2Fimage.png?alt=media\&token=546dcbd3-737e-406a-890e-3cc9e2fb1461)

## 1 file with 2 types or 2 files with 1 type (contact and client) <a href="#id-1-ficheiro-com-2-tipos-ou-2-ficheiros-com-1-tipo-contacto-e-cliente" id="id-1-ficheiro-com-2-tipos-ou-2-ficheiros-com-1-tipo-contacto-e-cliente"></a>

Follow these steps when your file contains only one type (for example, the file contains only contacts).&#x20;

Make sure your import file is already configured correctly. &#x20;

* In your Airdesk account, navigate to your contacts or clients. &#x20;
* In the top right corner, click on the 3 points and then Import. &#x20;
* Click on Start an Import.&#x20;

![](https://4075187781-files.gitbook.io/~/files/v0/b/gitbook-legacy-files/o/assets%2F-MMGy7hswNWyyiXACRWv%2F-MUJ2VcAwqBbO3dZknGy%2F-MUJ2rUDCpdHVmrLQRm4%2Fimage.png?alt=media\&token=a3248d20-0ae6-49e2-97e5-a6117d947bb5)

* Select 2 of the types you want to import.&#x20;
* Select whether you want to import from one or two files&#x20;
* If you want to import from a file, you must select which sheet each type is on&#x20;

![](https://4075187781-files.gitbook.io/~/files/v0/b/gitbook-legacy-files/o/assets%2F-MMGy7hswNWyyiXACRWv%2F-MUJ2VcAwqBbO3dZknGy%2F-MUJ2tsrhtTj7InYiFMx%2Fimage.png?alt=media\&token=673be51e-8db4-49b9-b063-8f5dbc569888)

* If you want to import from two files, you must add the respective file in the desired field:

![](https://4075187781-files.gitbook.io/~/files/v0/b/gitbook-legacy-files/o/assets%2F-MMGy7hswNWyyiXACRWv%2F-MUJ2VcAwqBbO3dZknGy%2F-MUJ3CLqs8FMt4ZQEybp%2Fimage.png?alt=media\&token=baa322a8-71cd-494f-9ef7-c6599a341f57)

* Configure the necessary mapping columns. &#x20;

  Find the explanation of each column in the table below:&#x20;

| Column Name  | Description                                                                                                                                                                                                                                                                              |
| ------------ | ---------------------------------------------------------------------------------------------------------------------------------------------------------------------------------------------------------------------------------------------------------------------------------------- |
| Coincides    | Validates if the column is already well mapped. Airdesk will automatically try to map properties according to the name of the columns in your file.                                                                                                                                      |
| Name         | Name of your file column. If your column is not appearing, there may be some inconsistency in the file, or no value is filled in.                                                                                                                                                        |
| Examples     | Examples of values detected from your file.                                                                                                                                                                                                                                              |
| Property     | These are Airdesk's properties. You should map your column of the file with the fields you want to save. Some fields are required to import new records.                                                                                                                                 |
| Overlap rule | <p>You must select among the options: </p><ul><li>Overlay existing data  </li><li>Overlap if value is empty </li><li>Do not overlap existing data </li></ul>                                                                                                                             |
| Duplicate    | When selected, the Airdesk will allow several records with the same value, otherwise the line will not be imported. This option will have no effect on data overlapping.                                                                                                                 |
| Reference    | AThe reference is required if you want to update data from existing records. When selected, Airdesk will use this field as a comparison value to overlay the remaining mapped data (depending on the overlap rules). If no record with the value is found, a new record will be created. |

* Select the information field that requests that columns without properties will not be imported.&#x20;
* By importing two types you can, for example, associate the contacts with the clients. To do so, you must create/use a customer identification field in the customer list and, in turn, in the contacts sheet create/use a column that indicates to which company the contact belongs. This step is essential for the contacts to be assigned to the companies in the import process.&#x20;
* Assign a name to the import&#x20;

![](https://4075187781-files.gitbook.io/~/files/v0/b/gitbook-legacy-files/o/assets%2F-MMGy7hswNWyyiXACRWv%2F-MUJ2VcAwqBbO3dZknGy%2F-MUJ3FASHXqBJxayw7dY%2Fimage.png?alt=media\&token=65b253fb-fa1f-4fff-a565-e0080c247fe5)

* Define the legal basis for data processing&#x20;
* To finish, submit the import&#x20;

{% hint style="info" %}
The import process doesn't interfere with the use of Airdesk. The import processes with many fields and several column validations make the process take longer. In the import list, you can follow the import process.&#x20;
{% endhint %}

In the import list, you can follow and check all imports. You should assign different names to the imports so that you can distinguish them.&#x20;

![](https://4075187781-files.gitbook.io/~/files/v0/b/gitbook-legacy-files/o/assets%2F-MMGy7hswNWyyiXACRWv%2F-MUJ2VcAwqBbO3dZknGy%2F-MUJ3HVKW_b-C9PqDEb2%2Fimage.png?alt=media\&token=c29b8961-0212-4e72-a6a1-f7f19e7c23d6)


# Sales

Manage your sales department in Airdesk.

In this section, we will discuss how you can manage and configure your sales department in Airdesk.&#x20;

![](https://4075187781-files.gitbook.io/~/files/v0/b/gitbook-legacy-files/o/assets%2F-MMGy7hswNWyyiXACRWv%2F-MVqqzyw7PuhZgYmpwvk%2F-MVqrFRgXMsaJbYTj8Fl%2Fcommercial.png?alt=media\&token=d624d314-ece6-4202-94b3-1f834a960fbb)


# Deals

Deals management with control of cases, tasks or hours.

Deal management is one of Airdesk's most useful features. It aims to manage any type of deal.  \
By using the contracts, you'll be able to create:&#x20;

```dart
Cases
    Tasks
        Times
```

Once there are launches made, Airdesk helps you to control or respond to the following questions:&#x20;

1. How many deals were closed this month?&#x20;
2. How much € value the client has yet to pay?&#x20;
3. How much € business value was raised by the seller?&#x20;
4. What's the state of the deal?&#x20;
5. What were the last deals requested by the customer?&#x20;
6. What company is the deal in?&#x20;
7. What's delaying the dispatch of the deal?&#x20;
8. How long ago was it sent to the client?&#x20;
9. Among others.&#x20;

### Deals Fields&#x20;

In order to be able to make manage deals with accuracy, it's important that you fill out the contract fields presented in the table below:&#x20;

| **Field name**        | **Description**                                                            |
| --------------------- | -------------------------------------------------------------------------- |
| Company               | Assign the contract to one of your companies.                              |
| Account               | You can associate with a client.                                           |
| Contact               | The customer's primary contact for the respective contract.                |
| Nº Sales Opportunity  | Number for those who want to identify a number, for example, from the ERP. |
| Name                  |                                                                            |
| Description           | Free contract description.                                                 |
| Start                 | Deal start date.                                                           |
| End                   | Deal end date.                                                             |
| Value                 | Monetary value of the contract.                                            |
| Pipeline              | Which pipeline it’s associated with.                                       |
| Deal Status           | What the status of the contract is.                                        |
| Responsible for Deal  | Who is the internal salesperson responsible for the deal.                  |
| Departments           | Who has access to the deal.                                                |
| Teams / Collaborators | Who has access, whether user or team.                                      |
| Attributed to         | To whom the contract is assigned internally.                               |
| Attachments           | Files attached to the contract.                                            |

### Deals special fields&#x20;

There are some view fields that help to monitor the state of the deal. These fields are dynamic and based on the settings of each contract.&#x20;

#### Originated/Completed&#x20;

The field allows you to know the total number of dependencies you have so that they can be closed. In the example below, you can see that the respective contract has 48 complete dependencies out of 51. &#x20;

![](https://4075187781-files.gitbook.io/~/files/v0/b/gitbook-legacy-files/o/assets%2F-MMGy7hswNWyyiXACRWv%2F-MUKGeOYSkIOo_rPJszG%2F-MUKHeVfSDXrm7WZxT_F%2Fimage.png?alt=media\&token=a778f9dc-bdcb-4616-ae77-df05f96dce50)


# Contracts

Contracts management with control of cases, tasks or hours.

Contract management is one of Airdesk's most versatile features. It aims to be able to control any type of contract.  \
By using the contracts, you'll be able to launch of:&#x20;

```dart
Cases
    Tasks
        Times
```

Once there are entries made, Airdesk helps you to control or respond to the following situations:&#x20;

1. How many hours are included in the contract.&#x20;
2. What the value of the contract is.&#x20;
3. How many tasks are left to complete the contract.&#x20;
4. When the contract is renewed.&#x20;
5. You cannot close a contract while cases or tasks are still open. It will be necessary to close everything before concluding the contract, so that the missing tasks are removed from the employees' agendas.&#x20;
6. How many hours were released this month?&#x20;
7. Has the client already exceeded the time limit?&#x20;
8. Why has this contract exceeded 20 hours?&#x20;
9. Among others.&#x20;

### Contract Fields&#x20;

In order to manage with contracts with accuracy, it's important that you fill out the contract fields presented in the table below:

| Field Name                     | Description                                                                                               |
| ------------------------------ | --------------------------------------------------------------------------------------------------------- |
| Company &#xD;                  | Assign the contract to one of your companies.                                                             |
| Assign to                      | You can associate the contract with a client or a deal.                                                   |
| Contact                        | The customer's primary contact for the respective contract.                                               |
| Pipeline                       | Which pipeline it’s associated with.                                                                      |
| Status                         | What the status of the contract is.                                                                       |
| Nº Sales Opportunity           | Number for those who want to identify a number, for example, from the ERP.                                |
| Type of Contract               | You must first configure the types of contract.                                                           |
| Total Value                    | Monetary value of the contract.                                                                           |
| Minimum billing interval (min) | You can configure the invoicing interval value, for example, 15 minutes.                                  |
| Rounding margin (min)          | You can define a rounding margin, for example 5 minutes.                                                  |
| Estimated time (Hours)         | Maximum estimated time you intend to spend on the contract                                                |
| Start                          | Contract start date.                                                                                      |
| End                            | Contract end date.                                                                                        |
| Travels                        | Total number of trips included.                                                                           |
| Renewal                        | Periodicity of contract renewal.                                                                          |
| Time Control Periodicity       | You can set the frequency of the time control.                                                            |
| Maximum hours per Period       | You can manage hours per month, for example, an annual contract that has a maximum of 40 hours per month. |
| Value per Hour                 | Monetary value, reference per hour.                                                                       |
| Description                    | Free contract description.                                                                                |
| Opening hours                  | Service timetable included in the contract.                                                               |
| Manager                        | Who is responsible for the contract.                                                                      |
| Departments                    | Who has access to the contract.                                                                           |
| Teams / Collaborators          | Who has access, whether user or team.                                                                     |
| Followers                      |                                                                                                           |
| Internal note                  | Internal description that will not be added to exports or notifications.                                  |
| Attachments                    | Files attached to the contract.                                                                           |

### Special contract fields&#x20;

There are some display fields that help to manage the status of contracts. These fields are dynamic and based on the settings of each contract.&#x20;

### Originated/Completed&#x20;

The field allows you to know the total number of dependencies you have so that it can be closed. In the example below, you can see that the respective contract has 4 complete dependencies out of 4.&#x20;

![](https://4075187781-files.gitbook.io/~/files/v0/b/gitbook-legacy-files/o/assets%2F-MMGy7hswNWyyiXACRWv%2F-MUJvu6Y4mAveC61njRM%2F-MUJwRNJLZs1rt7gsLjm%2Fimage.png?alt=media\&token=f795cf40-7846-46a1-b52e-7d5ddde2710e)

### Control by periodicity&#x20;

The field allows you to visualize, within the defined period, which contract has exceeded the desired hours. In the example below, you can see that in September contract hours were exceeded.&#x20;

![](https://4075187781-files.gitbook.io/~/files/v0/b/gitbook-legacy-files/o/assets%2F-MMGy7hswNWyyiXACRWv%2F-MUJvu6Y4mAveC61njRM%2F-MUJwSfXlFcw3_fx5Ls9%2Fimage.png?alt=media\&token=7dd86146-344b-46c3-9f4c-7266ff187c2b)

### Exceeded hours&#x20;

The field allows you to view exceeded hours launched per contract. The arrow indicates whether they were before or after the contract. In the example below, you can see that they were posted 10 hours and 32 minutes before the contract start date and 1 hour after the contract end date.&#x20;

{% hint style="warning" %}
This field is not used to validate exceeded hours.&#x20;
{% endhint %}

![](https://4075187781-files.gitbook.io/~/files/v0/b/gitbook-legacy-files/o/assets%2F-MMGy7hswNWyyiXACRWv%2F-MUJvu6Y4mAveC61njRM%2F-MUJwVo1ZW9MRpLh7Q9E%2Fimage.png?alt=media\&token=a3e4088f-fe11-4d5a-b730-9eb08ae4cd1f)

### Performance&#x20;

The field allows you to know, without having to calculate hours and in percentage, the number of hours skipped.&#x20;

![](https://4075187781-files.gitbook.io/~/files/v0/b/gitbook-legacy-files/o/assets%2F-MMGy7hswNWyyiXACRWv%2F-MUJvu6Y4mAveC61njRM%2F-MUJwXFeAU7ONq9gwrDR%2Fimage.png?alt=media\&token=8f6179d1-0c2e-4a4f-8f35-1a895922cb93)


# Subscriptions

Subcriptions management.

With the evolution of the Digital Market, companies are forced to acquire subscriptions. This module serves to manage digital or non-digital subscriptions. Below you'll find a list of examples of subscriptions:&#x20;

* Brand registrations and renewals&#x20;
* Domain registrations and renewals&#x20;
* Accommodation registrations and renovations&#x20;
* Program/software registrations and renewals&#x20;
* Warranty registrations and renewals and warranty extensions&#x20;
* Registration and renewal of licenses&#x20;

### Subscription Fields&#x20;

In order to be able to manage subscriptions with some accuracy, it's important that you fill out the subscription fields presented in the table below:&#x20;

| Field Name            | Description                                                                |
| --------------------- | -------------------------------------------------------------------------- |
| Company               | Assign the contract to one of your companies.                              |
| Associate to          | You can associate the contract with a client or with a subscription.       |
| Contact               | The customer's primary contact for the respective subscription.            |
| Pipeline              | Which pipeline it’s associated with.                                       |
| Status                | What the status of the contract is.                                        |
| Nº Sales Opportunity  | Number for those who want to identify a number, for example, from the ERP. |
| Type of Subscription  | Type You must first configure the subscription types.                      |
| Start                 | Subscription start date.                                                   |
| End                   | Subscription end date.                                                     |
| Renewal               | Periodicity of subscription renewal.                                       |
| Description           | Description of the subscription.                                           |
| Manager               | To whom the subscription is assigned internally.                           |
| Departments           | Who has access to the subscription.                                        |
| Teams / Collaborators | Who has access, whether user or team.                                      |
| Followers             |                                                                            |
| Internal note         | Internal description that will not be added to exports or notifications.   |
| Attachments           | Files attached to the contract.                                            |


# Classification

Know exactly the amount of time spent with each client.

Check whether the hours released either by project, contract or assistance, are correct or if there are irregularities. &#x20;

Easily classify the time spent with each business, track its progress, know exactly its start and end date, and the origin of the classification. &#x20;

![](https://4075187781-files.gitbook.io/~/files/v0/b/gitbook-legacy-files/o/assets%2F-MMGy7hswNWyyiXACRWv%2F-MUNzswMby-J2F1f4HRR%2F-MUO--SE33LWWA4Pst-k%2Fimage.png?alt=media\&token=b78b7fd5-8e50-4615-9272-14f0fd83142a)

The Classification module allows users to: &#x20;

* Quickly find the deal you are searching for by adding the filters: Account, Billing Nº, Billing Status, Classification Nº, Classification Origin, Company, Contract, Created by, Delivery time, Department, End Date, Inefficient hours, Inserted hours, Origin, Pauses, Project, Report to client, Start date, Team, Time, recorded Nº and Type of Time record.  &#x20;
* Create advanced custom filters for an easier search. You can classify the invoice status as: By Classify, By Invoice, Contract, Company, Project, Guarantee and Business. &#x20;
* Ordering by: Time Record Nº, Classification Nº, Billing Nº, Billing Status, Company, Start Date, End Date, Account, Duration, Inserted hours, Inefficient hours, Pauses and Type. &#x20;
* Group by: Client, Location and Organization.&#x20;


# Billing

Easily control customers' deals.

You can quickly find the billing you are looking for by adding the filters:&#x20;

* Account
* Classification Nº&#x20;
* Classification Origin&#x20;
* Company
* Created by
* No. Billing

You can also create advanced custom filters to make your search easier. &#x20;

![](https://4075187781-files.gitbook.io/~/files/v0/b/gitbook-legacy-files/o/assets%2F-MMGy7hswNWyyiXACRWv%2F-MUNuioSHRSt7YhYpJBg%2F-MUNwYQjv6AD0FDcmMqh%2Fimage.png?alt=media\&token=f686cc07-bc09-42ac-9d4a-dbb3d80fb476)

The Billing feature allows users to: &#x20;

* View customer account.&#x20;
* Know exactly how many hours were charged per customer.&#x20;
* Easily find details about the customer's account: Account Nº, VAT, responsible, associated contracts and associated projects.&#x20;
* Order the invoice by: No. Billing, Classification Nº, Company, Date, Account, Inserted Hours and Created by.&#x20;


# Services

Manage and configure the services in Airdesk.

In this section, we will discuss the management, configuration and assignment of services.&#x20;

![](https://4075187781-files.gitbook.io/~/files/v0/b/gitbook-legacy-files/o/assets%2F-MMGy7hswNWyyiXACRWv%2F-MUNcHGPFpLb-zDLrIWa%2F-MUNd7NsRgmRGbTVPp5m%2Fimage.png?alt=media\&token=29ff0214-3ba7-4ec7-81dc-3b4794a146a0)


# Calls

Customer call posting.

When using the calls feature, you can make entries from:&#x20;

```
Account
  └── Contract
  └── Deal
     └── Project
         └── Cases
             └── Task
```

Once there are entries made, Airdesk helps you to manage or respond to the following questions:&#x20;

* How many calls the customer has made?&#x20;
* When did the client call?&#x20;
* When did I call the client?&#x20;
* Which salesperson called?&#x20;
* Which technician called?&#x20;
* What is the support effort/Number of calls?&#x20;

### Call Fields&#x20;

In order to manage calls with accuracy, it's important that you fill out the contract fields presented in the table below:&#x20;

| Field name        | Description                                                           |
| ----------------- | --------------------------------------------------------------------- |
| Assign to         | You can associate it to a client, contract, task, deal, among others. |
| Contact           | The contact with whom the contact was made.                           |
| Enty              | Date of entry in system.                                              |
| Location          |                                                                       |
| Pipeline          | Which pipeline will be associated with.                               |
| Status            | What the status of the pipeline is.                                   |
| Department / Team | Who has access to the calls’ data.                                    |
| Assigned to       | To whom the contract is assigned internally.                          |
| Followers         |                                                                       |
| Description       | Contract description.                                                 |


# Projects

Management of all kinds of projects, small, medium and large.

Project management is one of Airdesk's most versatile features. It aims to control any type of project. When using this feature, you can create:&#x20;

```dart
Cases
    Tasks
        Times
```

Once there are entries made, Airdesk helps you to manage or respond to the following questions:&#x20;

1. How many hours are included in the project?&#x20;
2. &#x20;How many tasks are left to complete the project?&#x20;
3. &#x20;When is the delivery date?&#x20;
4. &#x20;It's not possible to close a project while cases or tasks are still open. It will be necessary to close everything before concluding the project, so that the missing tasks are removed from the employees' schedules.&#x20;
5. &#x20;How many hours were released this month?&#x20;
6. &#x20;Has the project already exceeded the hours limit?&#x20;
7. &#x20;Why has this project exceeded 20 hours?&#x20;
8. &#x20;Among others.&#x20;

### Project Fields&#x20;

In order to be able to manage projects with some accuracy, it's important that you fill out the contract fields presented in the table below:&#x20;

| Field name                            | Description                                                                |
| ------------------------------------- | -------------------------------------------------------------------------- |
| Company                               | Assign the call to one of your companies.                                  |
| Assign to                             | You can associate the contract with a client or deal.                      |
| Contact                               | The client's primary contact.                                              |
| Entry                                 | Date of entry in system.                                                   |
| Pipeline                              | Which pipeline will it be associated with.                                 |
| Status                                | What is the status of the contract.                                        |
| Avatar                                |                                                                            |
| Name                                  |                                                                            |
| Project Type                          | You must first configure the project types.                                |
| Nº Sales Opportunity                  | Number for those who want to identify a number, for example, from the ERP. |
| Estimated time (Hours)                | Maximum estimated time you intend to spend on the contract.                |
| Start                                 | Starting date of the contract.                                             |
| End                                   | Ending date of contract.                                                   |
| Description                           | Free project description.                                                  |
| Description to the person responsible |                                                                            |
| Manager                               | Who is responsible for the project.                                        |
| Departments                           | Who has access to the project’s data.                                      |
| Teams / Collaborators                 | Who has access, whether user or team.                                      |
| Followers                             |                                                                            |
| Attachments                           | Files attached to the contract.                                            |

### Special fields of the contract&#x20;

View fields help to control the status of contracts. These fields are dynamic and based on the settings of each contract.&#x20;

### Originated/Completed&#x20;

The field allows you to know the total number of dependencies so that they can be closed. In the example below, you can see that the respective contract has 4 complete dependencies out of 4.  &#x20;

![](https://4075187781-files.gitbook.io/~/files/v0/b/gitbook-legacy-files/o/assets%2F-MMGy7hswNWyyiXACRWv%2F-MUNfHwcD-V9Gc39fXm3%2F-MUNfqy6PYGms92G03z9%2Fimage.png?alt=media\&token=2a287a26-30e1-430e-9bde-3010f8ae307d)

### Control by periodicity&#x20;

The field allows you to view, within the defined period, which project has exceeded the desired hours. In the example below, you can see that in September contract hours were exceeded.&#x20;

![](https://4075187781-files.gitbook.io/~/files/v0/b/gitbook-legacy-files/o/assets%2F-MMGy7hswNWyyiXACRWv%2F-MUNfHwcD-V9Gc39fXm3%2F-MUNfuEX9QfYp1BtlGqc%2Fimage.png?alt=media\&token=02f930a5-2cf7-4991-8425-23d8d07f9d02)

### Out of contract hours&#x20;

The field allows you to view extra contract hours. The arrow indicates whether they were before or after the contract. &#x20;

In the example below, you can see that they were posted 10 hours and 32 minutes before the contract starting date, and1 hour after the contract ending date.&#x20;

{% hint style="warning" %}
This field is not used to validate extra hours.&#x20;
{% endhint %}

![](https://4075187781-files.gitbook.io/~/files/v0/b/gitbook-legacy-files/o/assets%2F-MMGy7hswNWyyiXACRWv%2F-MVvorzGB5stssyFWCUf%2F-MVvr9_ErC28niSCNCJ8%2Fimage.png?alt=media\&token=43e762a4-0fa1-48a1-bab4-5b6bef3fa54b)

### Extra contract hours&#x20;

{% hint style="warning" %}
This field is not used to validate outside the timetable.
{% endhint %}

This field allows you to know in percentage, without having to calculate hours, the number of extra hours. In the example below, it's possible to verify that the contract exceeded 38% of the estimated.&#x20;

![](https://4075187781-files.gitbook.io/~/files/v0/b/gitbook-legacy-files/o/assets%2F-MMGy7hswNWyyiXACRWv%2F-MUNfHwcD-V9Gc39fXm3%2F-MUNfz7G7QDdmADch32k%2Fimage.png?alt=media\&token=327482c9-8f9c-451b-a042-4aeaa11b5d39)

### Performance&#x20;

The field allows you to know in percentage, without having to calculate hours, the number of hours slipped.

![](https://4075187781-files.gitbook.io/~/files/v0/b/gitbook-legacy-files/o/assets%2F-MMGy7hswNWyyiXACRWv%2F-MUNfHwcD-V9Gc39fXm3%2F-MUNgBZ8XG1imZIwARch%2Fimage.png?alt=media\&token=77c35b75-33af-4bc8-a683-0c321efeac21)


# Cases

Case assignment.

When creating cases, you can launch:&#x20;

```
└── Tasks
    └── Time
```

Airdesk helps you to control or respond to the following situations:&#x20;

* Problems with a project.&#x20;
* Errors to rectify.&#x20;
* Modifications to make.&#x20;

### Case Fields

In order to control cases with accuracy, it's important that you fill out the fields of the case presented in the table below:&#x20;

| Field Name           | Description                                                               |
| -------------------- | ------------------------------------------------------------------------- |
| Associate to         | You can associate it to a client, contract, task, business, among others. |
| Contact              | The information of the contacted person.                                  |
| Entry                | System entry date.                                                        |
| Title                |                                                                           |
| Description          | Contract description.                                                     |
| Company              | Assign the contact to one of your companies.                              |
| Pipeline             | Which pipeline will it be associated with.                                |
| Status               | What is the status of the pipeline.                                       |
| Department / Team    | Who has access to the projects’ data.                                     |
| Assigned to          | To whom the contract is assigned internally.                              |
| Followers            |                                                                           |
| Location and Address | Place where the case will be executed.                                    |
| Attachments          | Relevant attachments to help with case resolution.                        |


# Tasks

Task Assignment.

When using the tasks, you can make postings of:&#x20;

```
└── Tempos
```

Airdesk helps you control or respond to the following situations:&#x20;

* What tasks are necessary to complete a project.&#x20;
* What tasks are required to complete a case.&#x20;
* Which tasks are assigned to the client.&#x20;
* Which tasks are assigned to the contract.&#x20;
* What tasks are assigned to the business.&#x20;
* Which tasks are assigned to the employee.&#x20;

### Task Fields&#x20;

In order to be able to perform a control with some accuracy, it's important that you fill out the fields presented in the table below:&#x20;

| Name of the field    | Description                                                                                 |
| -------------------- | ------------------------------------------------------------------------------------------- |
| Associate with       | You can associate it to a client, contract, task, business, among others.                   |
| Location and Address | Place where the case will be executed.                                                      |
| Name                 | Name of the task to be assigned.                                                            |
| Pipeline             | Which pipeline will be associated with.                                                     |
| Status               | What is the status of the pipeline.                                                         |
| Assigned to          | To whom the contract is assigned internally.                                                |
| Followers            |                                                                                             |
| Estimated time       | Estimated time for this task.                                                               |
| Start                | Date and time the task should start.                                                        |
| End                  | Date and time the task should be completed.                                                 |
| Checklist            | Create a checklist of goals within the task.                                                |
| Internal note        | A note only visible internally that should contain indications of how to complete the task. |
| Attachments          | Relevant attachments to help with the task resolution.                                      |


# Checklists

Create checklists and checklist templates.

In order to facilitate the accomplishment of tasks, you can create checklists.&#x20;

The checklists allow you to add fields with details about tasks to remind you to execute them in the future. You can organize tasks according to their priority by moving each item up or down.&#x20;

You can also create a checklist template that is stored in the system. You can use as many times as you want and change it for each specific case.&#x20;

It also allows you to search for a specific item.&#x20;

<div align="left"><img src="https://4075187781-files.gitbook.io/~/files/v0/b/gitbook-legacy-files/o/assets%2F-MMGy7hswNWyyiXACRWv%2F-MUO-42Cj2kBgGz5uKkw%2F-MUO6J99sBfrGTPNVvB_%2Fimage.png?alt=media&amp;token=b713f1a8-f9e5-4e7a-8f25-882455a3e0e4" alt=""></div>


# Time

Time entries.

Airdesk helps you control or respond to the following situations:&#x20;

* How many hours were spent in a project.&#x20;
* Where more employee hours are being spent.&#x20;
* Reasons that may be causing inefficient time.&#x20;
* Extra customer hours.&#x20;
* The exact time spent on each project.&#x20;

### Time Fields&#x20;

In order manage time with accuracy, it's important that you fill out the time fields presented in the table below:&#x20;

| Name of the field          | Description                                                               |
| -------------------------- | ------------------------------------------------------------------------- |
| Associate with             | You can associate it to a client, contract, task, business, among others. |
| Contact                    | The information of the contacted person.                                  |
| Location and Address       | If the service was remote or On-site and where was it.                    |
| Date                       | The date when the time was released.                                      |
| Start                      | Date and time the task should start.                                      |
| End                        | Date and time the task should be completed.                               |
| Inefficient Time (Minutes) | Inefficient time during launched time.                                    |
| Total Pauses (Minutes)     | Time in minutes of breaks during the time entry.                          |
| Travel time (Minutes)      | Travel time during the time entry.                                        |
| Type of Time record        | Time category released.                                                   |
| Report to client           | Detailed report of what was done in this time for the client.             |
| Internal note              | A note only visible internally.                                           |
| Followers                  |                                                                           |
| Attachments                | Relevant attachments.                                                     |


# Automation

Custom Workflows in Airdesk

![](https://4075187781-files.gitbook.io/~/files/v0/b/gitbook-x-prod.appspot.com/o/spaces%2F-MMGy7hswNWyyiXACRWv%2Fuploads%2FQWjKUADLC3EJhSyZNqRu%2FMicrosoftTeams-image%20\(7\).png?alt=media\&token=947f8afa-7af8-4743-964a-36971ff839b3)

Automation empowers you to focus on the work that matters, removing the need to perform manual, repetitive tasks by allowing your teams to automate their processes and workflows. With our simple rule builder, you can configure powerful automation rules to handle even the most complex scenarios.

This guide will outline the key concepts you need to know to get started, help you set up your first automation rule, and outline common use case rules you can edit and apply to your team’s processes.

{% hint style="warning" %}
Automation is only available to users with Owner or Administrator permission.
{% endhint %}

{% content-ref url="/pages/rc7b9aABcwT5lVT8n9Q0" %}
[Interface](/interface/servicos/automation/interface)
{% endcontent-ref %}

{% content-ref url="/pages/PkRULr2PekAb8rR3t1nQ" %}
[Key Concepts](/interface/servicos/automation/key-concepts)
{% endcontent-ref %}

{% content-ref url="/pages/hjzXqS0jtOuxgZfyPWos" %}
[Elements](/interface/servicos/automation/elements)
{% endcontent-ref %}

{% content-ref url="/pages/HTEiOUI8rBjSBGtUPbGT" %}
[Variables](/interface/servicos/automation/variables)
{% endcontent-ref %}


# Interface

Discover the Automation Interface

## Workflow Builder

### **Menu Bar**

![](https://4075187781-files.gitbook.io/~/files/v0/b/gitbook-x-prod.appspot.com/o/spaces%2F-MMGy7hswNWyyiXACRWv%2Fuploads%2FA8jesGhu6u2m1uNU0ROh%2FMicrosoftTeams-image.png?alt=media\&token=ce695533-1343-4a5b-8106-c7fc31d70cf8)

The menu bar provides information about the flow, such as:

* Name
* Settings
* Activity
* Whether the flow is active or not
* Hide/Show notes
* Test button
* Add nodes/actions
* Save

### **Canvas**

![](https://4075187781-files.gitbook.io/~/files/v0/b/gitbook-x-prod.appspot.com/o/spaces%2F-MMGy7hswNWyyiXACRWv%2Fuploads%2FNIlsW2atjxU8TWaO5Zgv%2FMicrosoftTeams-image%20\(4\).png?alt=media\&token=fa7c2667-87cc-40b6-9835-d5b2a157ee25)

The canvas is the working area, where you build a flow by adding elements. As you add elements to the canvas and connect them together, you see a visual diagram of your workflow.

### **Add nodes**

![](https://4075187781-files.gitbook.io/~/files/v0/b/gitbook-x-prod.appspot.com/o/spaces%2F-MMGy7hswNWyyiXACRWv%2Fuploads%2FzcqFnH0cWgbfx34Pre3S%2FMicrosoftTeams-image%20\(6\).png?alt=media\&token=c319fa7e-78e4-46e2-9240-fd167d459f78)

The "Add nodes" area contains a toolbox with access to all available resources to create workflows. In this area it is possible to find the available options of triggers, conditions, and actions that we want our workflow to run.

## Workflow Building Blocks

### **Elements**

![](https://4075187781-files.gitbook.io/~/files/v0/b/gitbook-x-prod.appspot.com/o/spaces%2F-MMGy7hswNWyyiXACRWv%2Fuploads%2FdOjOq2SGtUToHaU8LIsr%2FMicrosoftTeams-image%20\(3\).png?alt=media\&token=2ff44fcc-8959-4507-b8b9-ee748586214d)

All elements that will be part of the workflow. All must be chosen correctly for automation to work.

### **Connectors**

![](https://4075187781-files.gitbook.io/~/files/v0/b/gitbook-x-prod.appspot.com/o/spaces%2F-MMGy7hswNWyyiXACRWv%2Fuploads%2F6NgemslMg2nNYb2wP254%2FMicrosoftTeams-image%20\(5\).png?alt=media\&token=96924620-3c52-44c9-a2dc-34b2c69792d0)

Define the path that the flow takes at runtime. They tell the flow which element to execute next.

### **Values**

![](https://4075187781-files.gitbook.io/~/files/v0/b/gitbook-x-prod.appspot.com/o/spaces%2F-MMGy7hswNWyyiXACRWv%2Fuploads%2Fl69EFLwI24QWoS8bLGax%2FMicrosoftTeams-image%20\(2\).png?alt=media\&token=f2852654-7a8f-4c4d-90c6-69c0d472ddcc)

Are containers inside elements that represent a given value, such as field values or formulas. You can reference resources throughout your flow. For example, look up an account’s ID, store that ID in a variable, and later reference that ID to send an email with that information.


# Key Concepts

Learn the concepts of Airdesk Automation

## Workflows

Workflows allow you to automate actions within your system based on criteria that you set. Automation workflows are made up of three parts: triggers that kick off the flow, conditions that refine the rule, and actions that perform tasks in your site.

Triggers, conditions, and actions are the building blocks of automation. Simply combine these components to create workflows that can do anything from auto-closing create new tasks to notifying specific teams when a ticket changes state.

## Triggers

Every workflow starts with a trigger. They kick off the execution of your flow’s. Triggers will listen for events in Airdesk, such as, for example, when a project is created or when a field value is changed.

Triggers can be set to run on a schedule and can be customized before being applied to a workflow.

## Conditions

Conditions are one of the most important functions to create powerful workflows. With them we can create loops to validate various records, create custom properties, use the If/Else functions, among others.

## Actions

As the name implies, these are the actions that we want our workflow to perform. It can be from sending an email, creating a project, creating a task, sending a report, etc.

## Variables

Variables allow you to access and manipulate a wide range of data from your Airdesk workspace. They can add significant power and complexity to your rules. For example, **{{adn\["Project Trigger"]\["name"]}}** off the name of the project.

## Assigned to

The Assigned to field is where the workflow creator can choose who is going to run the automation. This user must have the relevant permissions to trigger the flow and complete any actions that may be performed.


# Elements

Know all the elements

## Triggers

### Creation/Edition

This trigger will always run a workflow when a record is created or edited. It will always detect this type of action when it occurs in the following modules:

* Account
* Contact
* Deal
* Contract
* Subscription
* Classification
* Call
* Project
* Case
* Task
* Time

We can tell this workflow that it will run when one of the options occurs, or with both options at the same time. We can also select custom values, for example, when the "Pipeline Status" field is changed to "Closed", run the workflow.

Custom values can be chosen based on "All" or "Or" conditions. In "All", the trigger will work if all conditions are the same as selected, in the case of "Or" it will run if one of the conditions is true.

### Manual

The manual trigger gives the option to create a workflow that will only run when the user requests it. We can create a workflow that creates a set of repetitive tasks, so we don't have to create them manually.

### Webhook

A webhook is a way for a third party to trigger an Automation Rule. When you configure the webhook trigger, it will give you a unique URL which you either add to the third-party application's outgoing webhook configuration or make a HTTP Post request from your custom scripts. The webhook trigger only expects to receive JSON payloads, you can use it through variables.

### Cron

This executes a workflow on a specified schedule. You can run the rule at a fixed rate every minute, hour, day, week, or month.

## Conditions

### If/Else

The “If/Else” block allows for alternate actions to be executed based on whether certain conditions match or don't match. It is a powerful condition, and you can add as many if/else conditions as you want.

### Property Setter

The Property Setter node is used to create new variables that are not tied to existing objects. These must have a unique name. It can also be used to update an existing variable created through another Property Setter block.

If we use "contract" as the name of a property setter block, we can call it later in the flow through the value **{{adn\["Property Setter"]\["contract"]}}**.

### Connect Workflow

The "Connect Workflow" block, as the name implies, allows us to connect the workflow we are creating to another created previously. With this step we avoid repeating the flow already created when we reach a certain point in the new workflow.

### Batch Split

The Split in Batches node is used when there is a list of values that need to inspected individual. This node only has 2 settings: the batches length, to set the total of items that need to be ran in each cycle, and the Value input which is the list.

After this, any node connected after the Split in Batches node will have access to two new variables from it, which are **{​{​adn\["Split in Batches"]\["context"]\["has\_more"]}​}**&#x200B;, that returns a Boolean indicating if there are more items in the list to be ran and **{​{​adn\["Split in Batches"]\["value"]}​}**&#x200B; which is the current value.

To pass to next cycle in the batch you must then connected the next node back to the Initial Batch Split, like you can see in the next example:

![](https://4075187781-files.gitbook.io/~/files/v0/b/gitbook-x-prod.appspot.com/o/spaces%2F-MMGy7hswNWyyiXACRWv%2Fuploads%2FGZbxjMge2e7uh4hDSy2T%2Fworkflow%20batch%20split%201.jpg?alt=media\&token=997c093d-0da5-4665-ab9b-f54abcde87af)

In this example, we are preparing an email body using the split in batches node to loop a received list of tasks. After setting the split in batches to have a batch size of 1 and setting the property setters to create the email body using the data from the current task, we add an If/Else node that will check the state of the variable **{{adn\["Split in Batches"]\["context"]\["has\_more"]}}**, and depending on if it’s true or false we can either connected back to the split in batches node to keep running our loop or exit the loop and create our email.

### Delay

The "Delay" condition allows the user to define, at a point in the workflow, a delay so that the flow waits the defined time until it advances to the next block.

### Do nothing

The "Do Nothing" block causes the flow to stop. For example, if we use the "If/Else" block, if in the else option we want the flow to stop, just allocate the "Do nothing".

## Actions

### Get Items

The Get node types are used when you need either a single or multiple item(s) of that type. You can use variables for filtering the items you need.

### Create

Use this action to create a record of any type. This creation step is like adding a record in Airdesk. Just select which type of record the workflow should create and add all the details. In the fields we can choose to use pre-defined records or use variables to obtain data from the workspace.

Airdesk Automation allows you to create the following records:

* Email
* Account
* Contact
* Deal
* Contract
* Subscription
* Call
* Project
* Task
* Case

### Reports

The "Reports" action allows you to create a workflow in which Airdesk automatically sends a report in PDF format by email. Currently, it is possible to send the time report.


# Variables

## What are variables?

Variables allow you to access and manipulate any data from Airdesk. It sounds like a complex concept, but once you learn the basics it is very easy and powerful to use this functionality.

Variables are values referring to various fields in Airdesk, which can be used in many ways, from searching for a certain value in a workspace module, or to writing a personalized email with data from records called in the workflow.

For example the variable **{{adn\["Task Trigger"]\["id"]}}** references the Id of the triggered task.

## How to get variables?

As we add blocks to the canvas, the associated variables will be listed in the variable list available when editing a block. To access the list, we just need to select the gear icon next to the field we want to edit.

![](https://4075187781-files.gitbook.io/~/files/v0/b/gitbook-x-prod.appspot.com/o/spaces%2F-MMGy7hswNWyyiXACRWv%2Fuploads%2FnBl0fNd6VhX35YhmPnrl%2Fvaribles%201.png?alt=media\&token=d732b96f-3ad3-4c70-bd95-3aba9910a745)

When clicked, a pop-up opens with the variables available per module and with the text editor for this field, so that we can search for the variable we want to use.

![](https://4075187781-files.gitbook.io/~/files/v0/b/gitbook-x-prod.appspot.com/o/spaces%2F-MMGy7hswNWyyiXACRWv%2Fuploads%2FI6Ox16aF65ugeSxd8Qfe%2Fvaribles%202.png?alt=media\&token=1a5eeb3d-53ce-4bea-9288-f6676e538edb)

## Using variables

Using variables can be a simple way to work with automation and get the most out of it. But for that it is necessary to understand how we can use them.

Let's look at the following example:

![](https://4075187781-files.gitbook.io/~/files/v0/b/gitbook-x-prod.appspot.com/o/spaces%2F-MMGy7hswNWyyiXACRWv%2Fuploads%2F7Edw9Z0D6PTtmCSIGQKA%2Fvaribles%203.png?alt=media\&token=7e6590fd-6ef2-43ba-ab5b-a1a5680942e3)

In this example, we intend to send an email whenever a new Ticket is created. To run this workflow, we need to use a created Ticket trigger, followed by a Create Email action.

After we have the blocks placed on the canvas and linked, we move on to configuring the email. As the first step is the Ticket trigger created, then we can access all the information on the new ticket. These details can be used to edit the email.

In this example, what we want to use is the new ticket number in the email subject. For this, we use the variable **{{adn\[“Ticket Trigger”]\[“id”]}}** which will return the number of the new record.

![](https://4075187781-files.gitbook.io/~/files/v0/b/gitbook-x-prod.appspot.com/o/spaces%2F-MMGy7hswNWyyiXACRWv%2Fuploads%2FYTi6U4EJXf1opML2moHY%2Fvaribles%204.png?alt=media\&token=9c0df3fb-e314-4edd-a40e-4ed0cd633d20)

The recipient will receive an email with the subject, for example, “New ticket with number 47”.

Using the same workflow, we can also customize the body of the email to give us as much information as possible about the new ticket.

![](https://4075187781-files.gitbook.io/~/files/v0/b/gitbook-x-prod.appspot.com/o/spaces%2F-MMGy7hswNWyyiXACRWv%2Fuploads%2FU8OhuZRva0M1tmSPlf9j%2Fvaribles%205.png?alt=media\&token=57b0e20c-a450-417b-a898-ce8e7f0d3626)

Variables used in the email:

| Variable                                                                                                                                        | Description                                                                                                                |
| ----------------------------------------------------------------------------------------------------------------------------------------------- | -------------------------------------------------------------------------------------------------------------------------- |
| {{adn\["Ticket Trigger"]\["indirect\_client"]?adn\["Ticket Trigger"]\["indirect\_client"]\["name"]:adn\["Ticket Trigger"]\["client"]\["name"]}} | If the field "indirect\_client" exists, type the name of the "indirect\_client", otherwise, type the name of the "client". |
| {{adn\["Ticket Trigger"]\["id"]}}                                                                                                               | Returns the ID of the ticket created                                                                                       |
| {{adn\["Ticket Trigger"]\["name"]}}                                                                                                             | Returns the subject of the ticket created                                                                                  |

Email received by workflow recipient:

![](https://4075187781-files.gitbook.io/~/files/v0/b/gitbook-x-prod.appspot.com/o/spaces%2F-MMGy7hswNWyyiXACRWv%2Fuploads%2Fa7MzT8HnejOXh5NM9l4v%2Fvaribles%206.png?alt=media\&token=576a3f8f-12a2-4b30-a692-a830d17d126e)

## Using logic operators on variables

It is also possible with variables to use logical operators in Javascript to create more advanced workflows.

Example:

> {{adn\["Ticket Trigger"]\["indirect\_client"]?adn\["Ticket Trigger"]\["indirect\_client"]\["name"]:adn\["Ticket Trigger"]\["client"]\["name"]}}

In the example, we can see that between double curly braces, we use a condition in Javascrip to verify if the variable **"adn\["Ticket Trigger"]\["indirect\_client"]"** exists, the value of the variable will be **"adn\["Ticket Trigger"]\["indirect\_client"]\["name"]"**, otherwise the value will be **" adn\["Ticket Trigger"]\["client"]\["name"]"**.

> *Sintax: variablename = (condition)? value1:value2*

To use variables and conditions, we must always enclose them in double braces **{{}}** and values are always identified by **adn\["Ticket Trigger"]\["indirect\_client"]**.


# Pipelines

Create the ideal route for your business.

Airdesk allows you to create pipelines to organize your routines and give you more control over your business and opportunities.&#x20;

The creation of pipelines allows users to:&#x20;

* Overview ongoing sales opportunities.&#x20;
* Know the value of each sales opportunity.&#x20;
* Track sales opportunities that are taking time to materialize.&#x20;
* Know the average time of sales cycle and each step of the process.&#x20;
* Easily manage the sales force.&#x20;
* Standardize procedures.&#x20;
* Predict sales for different periods based on ongoing opportunities.&#x20;

![](https://4075187781-files.gitbook.io/~/files/v0/b/gitbook-legacy-files/o/assets%2F-MMGy7hswNWyyiXACRWv%2F-MUO6NtgvJYcJvazwjxu%2F-MUO6Z1zZlMQ2MbLo3Jm%2Fimage.png?alt=media\&token=67b54188-f8bf-46d0-b299-850636e66301)


# Marketing

{% content-ref url="/pages/-MMKqPESfSudiY6tJweO" %}
[Social Media](/interface/social-media/marketing)
{% endcontent-ref %}

{% content-ref url="/pages/-MVw1CN2e2l6zdOy3GND" %}
[Email Signature](/interface/social-media/email-signature)
{% endcontent-ref %}


# Social Media

Social media management.

With the Airdesk marketing module you **can manage the social networks you need** without having to worry about sharing access and passwords. &#x20;

**You can also:**&#x20;

* Manage Facebook, Linkedin and Twitter&#x20;
* Create drafts&#x20;
* Publish Posts&#x20;
* Schedule Posts&#x20;
* Share various multimedia content (images, videos, links)&#x20;
* Duplicate publications&#x20;
* Preview publications&#x20;
* Choose an intelligent number of hours for publications.&#x20;

<div align="left"><img src="https://4075187781-files.gitbook.io/~/files/v0/b/gitbook-legacy-files/o/assets%2F-MMGy7hswNWyyiXACRWv%2F-MUO6c2y2guz4zC2fvSk%2F-MUO6z2qbm5PeQ2NANuX%2Fimage.png?alt=media&amp;token=274e4618-8cf9-49f0-9025-9f19b511fb9e" alt=""></div>

### Marketing fields&#x20;

<div align="left"><img src="https://4075187781-files.gitbook.io/~/files/v0/b/gitbook-legacy-files/o/assets%2F-MMGy7hswNWyyiXACRWv%2F-MUO6c2y2guz4zC2fvSk%2F-MUO749fcoYdkGmR1gZW%2Fimage.png?alt=media&amp;token=e021c014-4648-4c4e-aad5-0d3cac4ee218" alt=""></div>

| Field Name            | Description                                                                             |
| --------------------- | --------------------------------------------------------------------------------------- |
| Status                | You can choose to publish the post or save it as a draft.                               |
| Social media accounts | Social media accounts you want to manage.                                               |
| Publishing date       | The date you want the post to be published, if you don't want to publish it right away. |
| Publish now           | To publish immediately.                                                                 |
| Description           | Content of your posts.                                                                  |
| Attachments           | Image of the post, you can import it from your PC or via link.                          |
| Image                 | You can preview the image or delete it.                                                 |
| Preview               | You can preview the post before publishing or scheduling it.                            |


# Email Signature

Create professional email signatures for your business.

In Airdesk you can automatically customize the email signature of a user, team, department, or even an entire company. You can manage multiple signatures simultaneously and understand the status of each one.

![](https://4075187781-files.gitbook.io/~/files/v0/b/gitbook-x-prod.appspot.com/o/spaces%2F-MMGy7hswNWyyiXACRWv%2Fuploads%2FodhS6ZUwK9BBgKqqjB2T%2Fsignature%201.png?alt=media\&token=1448aba6-c4c8-457b-93bf-386b4533384f)

You can choose from 5 pre-defined templates or create your own, and get a real-time preview of the final result within Airdesk, or via e-mail to your user.

![](https://4075187781-files.gitbook.io/~/files/v0/b/gitbook-x-prod.appspot.com/o/spaces%2F-MMGy7hswNWyyiXACRWv%2Fuploads%2FjRayLm1LsITaYzlU842A%2Fsignature%202.png?alt=media\&token=8eba46f7-caed-4631-a88b-9a49350071db)


# Reports

Create and export 360º reports of your company.

In the reports, you can choose the period of time you want to check by selecting the start date and end date. &#x20;

The reports work with customizable blocks. You can adjust the size or select which blocks should appear. &#x20;

Select all the tasks or those of a certain level of hierarchy: &#x20;

* Company&#x20;
* Department&#x20;
* Teams&#x20;
* Team members&#x20;

You can also filter the reports by pipeline and download a file in spreadsheet format.&#x20;

![](https://4075187781-files.gitbook.io/~/files/v0/b/gitbook-legacy-files/o/assets%2F-MMGy7hswNWyyiXACRWv%2F-MUO7ZkuAFoXXr7OqoZq%2F-MUO7h6qucZzaKc2_-WT%2Fimage.png?alt=media\&token=e7cc8e33-2963-4127-b7f1-83d3d8f37497)


# Services

{% content-ref url="/pages/-MMLAXfOBwxlGQewwEwF" %}
[Timesheet](/interface/relatorios/services/timesheet)
{% endcontent-ref %}

{% content-ref url="/pages/-MMLAaheoZlrhoTjV1Tv" %}
[Tasks](/interface/relatorios/services/tasks)
{% endcontent-ref %}

{% content-ref url="/pages/-MMLAbB0E\_OKV8bryeTJ" %}
[Cases](/interface/relatorios/services/cases)
{% endcontent-ref %}

{% content-ref url="/pages/-MMLAbed1fPpZ7MY0KIJ" %}
[Projects](/interface/relatorios/services/projects)
{% endcontent-ref %}


# Timesheet

Check the times posted by your employees.

![](https://4075187781-files.gitbook.io/~/files/v0/b/gitbook-legacy-files/o/assets%2F-MMGy7hswNWyyiXACRWv%2F-MUO7zRvwxrdrnvcLtW7%2F-MUO80EkcRaJ0pfpmg4B%2Fimage.png?alt=media\&token=9317905d-3663-462a-aff1-ac4e2d83d36f)


# Tasks

Track your company's task count, response time, and more.

![](https://4075187781-files.gitbook.io/~/files/v0/b/gitbook-legacy-files/o/assets%2F-MMGy7hswNWyyiXACRWv%2F-MUO9dWkoMOcuF-qaMVe%2F-MUOBBb66IRpiGXFZ_ed%2Fimage.png?alt=media\&token=caa2012c-57a9-4d40-8564-a945c6a45fed)


# Cases

Track your company's case count, response time and more.

![](https://4075187781-files.gitbook.io/~/files/v0/b/gitbook-legacy-files/o/assets%2F-MMGy7hswNWyyiXACRWv%2F-MUOBX3KmbOMbs3p4HPp%2F-MUOBgfu5hdB2ULjPzQc%2Fimage.png?alt=media\&token=fe423ec3-30b2-48a5-9139-7caedd7f8cbd)


# Projects

Have a global view of the development of your company's projects.

![](https://4075187781-files.gitbook.io/~/files/v0/b/gitbook-legacy-files/o/assets%2F-MMGy7hswNWyyiXACRWv%2F-MUOBkTyUf73KdlSlwrH%2F-MUOC4qnXExmCjbOnLEO%2Fimage.png?alt=media\&token=dd010845-6ac8-453a-bbdb-7ce837dc2121)


# Sales

{% content-ref url="/pages/-MMLAsacJKVPoBi3n-A1" %}
[Contracts](/interface/relatorios/commercial/contracts)
{% endcontent-ref %}

{% content-ref url="/pages/-MMLAw8sz-SjNjqGX2LA" %}
[Deals](/interface/relatorios/commercial/deals)
{% endcontent-ref %}

{% content-ref url="/pages/-MMLAyJVq9q8e9DSXpD\_" %}
[Classification](/interface/relatorios/commercial/classification)
{% endcontent-ref %}


# Contracts

Have a global view of the development of your company's contracts.

![](https://4075187781-files.gitbook.io/~/files/v0/b/gitbook-legacy-files/o/assets%2F-MMGy7hswNWyyiXACRWv%2F-MUOCPZtGkXtQpohQIWI%2F-MUOChVYpIAYsGTzjvbJ%2Fimage.png?alt=media\&token=35fab103-430b-48f4-ae05-99b710523c02)


# Deals

Track the opportunities created by your sales team, close deals and more.

![](https://4075187781-files.gitbook.io/~/files/v0/b/gitbook-legacy-files/o/assets%2F-MMGy7hswNWyyiXACRWv%2F-MUOCpH8Z3Yvhs4ixYHW%2F-MUOCwneiH_wL-vNejcj%2Fimage.png?alt=media\&token=3b6c8e8e-01ae-42b4-a16b-d4ce6aa714fc)


# Classification

See the rankings of times posted by your collaborators.

![](https://4075187781-files.gitbook.io/~/files/v0/b/gitbook-legacy-files/o/assets%2F-MMGy7hswNWyyiXACRWv%2F-MUOCpH8Z3Yvhs4ixYHW%2F-MUOE8TmkgpsmMuYkYdw%2Fimage.png?alt=media\&token=27f55393-c6bd-4e2c-9da9-7e0a562b7679)


# Administration

![](https://4075187781-files.gitbook.io/~/files/v0/b/gitbook-legacy-files/o/assets%2F-MMGy7hswNWyyiXACRWv%2F-MUOEOrNc28aWNVDRPnC%2F-MUOFqMR44nLeBzP7h4U%2Fadministration.png?alt=media\&token=defe516f-2fcd-4931-be58-53cb856e3671)

{% hint style="info" %}
The settings in this section are only available to workspace administrators.
{% endhint %}


# Dashboard

{% hint style="info" %}
The settings in this section are only available to workspace administrators.
{% endhint %}

{% content-ref url="/pages/-MMLCe0ROdELvdZvCNrN" %}
[General](/interface/administracao/espaco/geral)
{% endcontent-ref %}

{% content-ref url="/pages/-MMLFj9ojIsHWAaZTrAO" %}
[Companies/Subsidiaries](/interface/administracao/espaco/empresas-filiais)
{% endcontent-ref %}

{% content-ref url="/pages/-MMLFsVh5R47FB2RcGnn" %}
[Departments](/interface/administracao/espaco/departamentos)
{% endcontent-ref %}

{% content-ref url="/pages/-MMLFt1aO\_OH2t2ADMXX" %}
[Teams](/interface/administracao/espaco/equipas)
{% endcontent-ref %}

{% content-ref url="/pages/-MMLFxlReEjPj\_HY-vnG" %}
[Users](/interface/administracao/espaco/utilizadores)
{% endcontent-ref %}

{% content-ref url="/pages/-MMLFzlw9Ho2QcMJewUN" %}
[Widget for website](/interface/administracao/espaco/widget-para-site)
{% endcontent-ref %}

{% content-ref url="/pages/-MMLG32Zd4hOOvROeDql" %}
[Additional Widget Options](/interface/administracao/espaco/opcoes-adicionais-do-widget)
{% endcontent-ref %}


# General

{% content-ref url="/pages/-MMLCj\_AVEqYq683MFrA" %}
[General](/interface/administracao/espaco/geral/geral)
{% endcontent-ref %}

{% content-ref url="/pages/-MMLCoGATdRIh3iOn081" %}
[Exports](/interface/administracao/espaco/geral/exportacoes)
{% endcontent-ref %}


# General

Definitions across the entire Airdesk workspace

There are several options in the workspace configuration:&#x20;

* **Name**&#x20;
* **Currency**&#x20;

## Name&#x20;

The name of the workspace is the name that users see in the menu. It only serves to situate users.&#x20;

{% hint style="info" %}
This name is not used in any media.&#x20;
{% endhint %}

## Currency&#x20;

The "Currency" field allows you to define in which currency the Airdesk will work. It's possible to add multiple currencies, but the conversion is not automatic. The first currency field is mandatory.&#x20;


# Exports

History of exports

![](https://4075187781-files.gitbook.io/~/files/v0/b/gitbook-legacy-files/o/assets%2F-MMGy7hswNWyyiXACRWv%2F-MUOaBnnUd2heEaFB1Ui%2F-MUOa_fMgYf7BI5WAmyr%2Fadministration_dashboard_general_exports_icon.png?alt=media\&token=00a23f1b-2214-4a90-8163-5710ab4ac6ca)

![](https://4075187781-files.gitbook.io/~/files/v0/b/gitbook-legacy-files/o/assets%2F-MMGy7hswNWyyiXACRWv%2F-MUOaBnnUd2heEaFB1Ui%2F-MUOadv1Nhu4cfMPlZf8%2Fadministration_dashboard_general_exports_account.png?alt=media\&token=128aa11f-5a80-4b34-8d32-a365b3338308)

In this area, you can check all the history of exports that were executed in your workspace.&#x20;

![](https://4075187781-files.gitbook.io/~/files/v0/b/gitbook-legacy-files/o/assets%2F-MMGy7hswNWyyiXACRWv%2F-MUOaBnnUd2heEaFB1Ui%2F-MUOakcibGS4mJdfJz2b%2Fadministration_dashboard_general_exports.png?alt=media\&token=61bda8eb-d3c7-47c6-9d03-6eae05974cdf)

| Column         | Description                           |
| -------------- | ------------------------------------- |
| Date           | When the export was executed.         |
| User           | Which user executed it.               |
| Quantity       | Quantity of exported records.         |
| Export         | What was exported.                    |
| View           | In what view was the action executed. |
| File           | Link to generate a similar file.      |
| Start Interval | Start date used in the export range.  |
| Interval End   | End date used in the export range.    |


# Companies/Subsidiaries

Creation of the companies or subsidiaries of the group

In this menu, you can add the companies or branches of the group.

![](https://4075187781-files.gitbook.io/~/files/v0/b/gitbook-legacy-files/o/assets%2F-MMGy7hswNWyyiXACRWv%2F-MUObH-nW332JiU2g48o%2F-MUOe23ImPAaBbBz-8os%2Fimage.png?alt=media\&token=e614ac8b-7bf8-49e0-bbc6-a94a0a4e491a)

Avatar - The company's avatar.&#x20;

Logo - The company's logo.&#x20;

Name - The company's name.&#x20;

Domain - The company's domain (ex: [www.aridesk.ai).\&#x20](http://www.aridesk.ai\).\&#x20);

Responsible - Person(s) in charge of the company.&#x20;

Employees - The company's employees.&#x20;

{% hint style="info" %}
In this step, you should have already invited [**employees**](https://en.docs.airdesk.ai/interface/administracao/espaco/utilizadores/invitations).&#x20;
{% endhint %}

NIF - The company's NIF.&#x20;

Email - The company's email address.&#x20;

Telephone number - The company's phone number.&#x20;

Address - The company's address.&#x20;

Opening hours - The company's opening hours. &#x20;

Social media - Link to the company's social media (ex: [**http://linkedin.com/showcase/airdeskai**](http://linkedin.com/showcase/airdeskai)).&#x20;


# Departments

Creation of company departments

In this panel, you can add the department(s) within your company.&#x20;

{% hint style="info" %}
You should have the [**companies**](https://en.docs.airdesk.ai/interface/administracao/espaco/empresas-filiais) configured first.&#x20;
{% endhint %}

![](https://4075187781-files.gitbook.io/~/files/v0/b/gitbook-legacy-files/o/assets%2F-MMGy7hswNWyyiXACRWv%2F-MUOfImJIhjj0q8mO97z%2F-MUOgIYAVLFyojH83yLO%2Fimage.png?alt=media\&token=670cddd8-41c5-4261-985e-85912c7f6e49)

Company - Company to which you want to associate the department with.&#x20;

Name - The department's name.&#x20;

Email - The department's email address.&#x20;

Phone No. - The department's phone number.&#x20;

Responsible - The person responsible for the department.&#x20;

Employees - The employees who are part of the department.&#x20;

{% hint style="info" %}
In this step, you should have already invited [**employees**](https://en.docs.airdesk.ai/interface/administracao/espaco/utilizadores/invitations).&#x20;
{% endhint %}


# Teams

Creation of teams by department

You can create teams by department.&#x20;

{% hint style="info" %}
For this step, you must have already configured the [**departments**](https://en.docs.airdesk.ai/interface/administracao/espaco/departamentos).&#x20;
{% endhint %}

![](https://4075187781-files.gitbook.io/~/files/v0/b/gitbook-legacy-files/o/assets%2F-MMGy7hswNWyyiXACRWv%2F-MUOh9qN6ZMHF0l9BFsT%2F-MUOhJuXxHARRKQZkRPy%2Fimage.png?alt=media\&token=49bd112b-cee4-4646-be11-3c282c870000)

Department - Department to which you want to associate the team.&#x20;

Name – The team’s name.&#x20;

Responsible – The team’s responsible.&#x20;

Employees - The team’s members.&#x20;

Email - The team’s email address.&#x20;

Phone Number – The team member’s phone number.&#x20;


# Users

Account used to access Airdesk

Airdesk works similarly to other platforms with a single access account. With a single account, you can access several workspaces.&#x20;

{% hint style="info" %}
Permissions function by workspace.  \
Visit the[ **permissions page**](https://en.docs.airdesk.ai/interface/administracao/espaco/utilizadores/permissions) to learn more.&#x20;
{% endhint %}

A user is composed of various information and settings:&#x20;

| Field name  | Description                                                                                                 |
| ----------- | ----------------------------------------------------------------------------------------------------------- |
| Email       | Email access and communications.                                                                            |
| Extension   | Extension number within the organization.                                                                   |
| Companies   | Company or companies to which the user belongs.                                                             |
| Gender      | Gender is only for future human resource purposes and/or for legal reasons the options are: male or female. |
| Departments | Department(s) to which the user belongs.                                                                    |
| Teams       | Team(s) to which the user belongs.                                                                          |

There is also the possibility to block or delete the user.&#x20;

{% hint style="danger" %}
Deleting the user only means that nothing can be assigned to him in the future, but if there is information from the past assigned to him, it will remain assigned. It means that, while searching, you can still find related information about this user.&#x20;
{% endhint %}


# Invitations

Invite your team to Airdesk

In this menu, you can invite and manage the invitations sent to employees and team members.&#x20;

![](https://4075187781-files.gitbook.io/~/files/v0/b/gitbook-legacy-files/o/assets%2F-MMGy7hswNWyyiXACRWv%2F-MUOj0wd8lS-3bnyjw3v%2F-MUOjca6tCCztLtbXgeU%2Fimage.png?alt=media\&token=495ee33a-e909-4732-a795-3c30a769af94)


# Permissions

What data can the user access or create

## Introduction to permissions

Within an organization, there are several types of persons/entities that can collaborate with it, for example:&#x20;

* Administrators&#x20;
* Managers&#x20;
* Heads of departments&#x20;
* Employees&#x20;
* Curricular Internships&#x20;
* Professional Internships&#x20;
* Outsourcing&#x20;
* External partners&#x20;
* External consultants&#x20;

The access to information is also dynamic, like the cases below:&#x20;

* Trainee can only access their information.&#x20;
* They can access all the information of the their team.&#x20;
* The person in charge can access all the information of the department.&#x20;
* The Billing team can access everything and edit everything.&#x20;
* The Sales team can access everything but only edit the deals feature.&#x20;

Not only are there countless types of people/entities. But there are also cases where, some users can only access a specific information, others can access all  information, or even non-sensitive data.&#x20;

To meet all needs, Airdesk works with a hierarchical level of permissions, represented as follows:&#x20;

```
Workspace 
└── Companies 
    └── Departments 
        └── Teams 
            └── Users 
```

## Types of Users&#x20;

**Airdesk** allows the user to define individual rules. &#x20;

There are several types of users in Airdesk:&#x20;

* Owner &#x20;
* Administrators &#x20;
* User&#x20;

### Owner&#x20;

The Owner has access to all workspaces and information. This user can never be blocked or removed and can create Administrators or Users.&#x20;

### Administrators &#x20;

The Administrator has access to all the space This user can be blocked or removed and can create Administrators or Users. He will not be able to change any Owner's data.&#x20;

### Users&#x20;

Users have individual permissions and by default don't have access to the configuration panel.&#x20;

## Types of Permissions&#x20;

The permissions are divided into the following categories:&#x20;

![](https://4075187781-files.gitbook.io/~/files/v0/b/gitbook-legacy-files/o/assets%2F-MMGy7hswNWyyiXACRWv%2F-MUOjfxWmF4LiyKA6r4z%2F-MUOlFXYxaWmHicsPcqt%2Fimage.png?alt=media\&token=96614881-6b5d-4694-b2f0-620d7edfc1e7)

### User&#x20;

In the user category, you can assign the user to:&#x20;

* Company&#x20;
* Department(s)&#x20;
* Team(s)&#x20;

### Contacts&#x20;

In the "Contact" category, it's possible to define if the user has access to sensitive data such as: name, email, birthday, among others. There are situations where employees don't need to have access to contact data, but only to task or case information. &#x20;

In this area, you can assign the access to import.&#x20;

### Services&#x20;

It's in the category of services that the permissions are assigned in order for users to explore Airdesk. Below is an example of a possible permission:&#x20;

![](https://4075187781-files.gitbook.io/~/files/v0/b/gitbook-legacy-files/o/assets%2F-MMGy7hswNWyyiXACRWv%2F-MUOjfxWmF4LiyKA6r4z%2F-MUOlXrgWeRbko49k6gs%2Fimage.png?alt=media\&token=2b6154fc-9a4c-4318-aca7-7d0544221c3f)

This user has access to the call MENU. He/she cannot export any data. He/she can view all calls from the workspace, but only edit those of the company of which he/she is a member, but cannot delete any data.&#x20;

He/she can assign individual permissions per service:&#x20;

![](https://4075187781-files.gitbook.io/~/files/v0/b/gitbook-legacy-files/o/assets%2F-MMGy7hswNWyyiXACRWv%2F-MUOjfxWmF4LiyKA6r4z%2F-MUOla9o-0DHGDWM45Xf%2Fimage.png?alt=media\&token=e8e5b22f-be45-4b18-bd8b-a20a75d618af)

### Reports&#x20;

In this category, you can give access to reports.&#x20;

### Configuration&#x20;

In this category, you can give access to Airdesk's configuration menu.&#x20;

### Admin&#x20;

In this category, you can assign Admin access to a user.&#x20;


# Widget for website

Code to activate support widget on your website

In this section, you can configure the support widget that will appear on your website.&#x20;

This widget, when filled in by a client will automatically create a case with the message and data entered. &#x20;

The configuration consists of 4 steps: Widget, Form, Blocks and Settings.&#x20;

We will cover each step individually.&#x20;

### Widget

![](https://4075187781-files.gitbook.io/~/files/v0/b/gitbook-legacy-files/o/assets%2F-MMGy7hswNWyyiXACRWv%2F-MUOlrKZwdEDPjJ2G__J%2F-MUOo_TrWaae-_Ym-Iks%2Fimage.png?alt=media\&token=3e508fcd-09be-43b8-b466-562d11936a37)

Name - The internal name of the created widget.&#x20;

Company - The company that the widget will be associated with.&#x20;

{% hint style="info" %}
To complete this step, you must have configured the [**companies**](https://en.docs.airdesk.ai/interface/administracao/espaco/empresas-filiais).&#x20;
{% endhint %}

Languages - Languages in which the support is available.&#x20;

Selected language - Main language to display.&#x20;

Avatar - Image to appear on the widget's top left corner.&#x20;

Title - Title of the widget.&#x20;

Description - Description to appear on the widget.&#x20;

Social media - Social media to appear in the widget.&#x20;

{% hint style="info" %}
To display social media, you must configure the [**company**](https://en.docs.airdesk.ai/interface/administracao/espaco/empresas-filiais).&#x20;
{% endhint %}

![](https://4075187781-files.gitbook.io/~/files/v0/b/gitbook-legacy-files/o/assets%2F-MMGy7hswNWyyiXACRWv%2F-MUOlrKZwdEDPjJ2G__J%2F-MUOott1fGFwPnj_m8Pm%2Fimage.png?alt=media\&token=3693aa35-0c11-4825-984e-8132a900c70b)

Theme - You can customize the colors of the widget to match the colors of your company on the site.&#x20;

{% hint style="info" %}
All colors inserted must be in HEX form (e.g. #000000 is equivalent to black).&#x20;
{% endhint %}

#### Configure button&#x20;

Name - Name to be displayed on the button.&#x20;

Background - Button background color in HEX format.&#x20;

Footer - Text to appear in the footer.&#x20;

###

### Form&#x20;

![](https://4075187781-files.gitbook.io/~/files/v0/b/gitbook-legacy-files/o/assets%2F-MMGy7hswNWyyiXACRWv%2F-MUOlrKZwdEDPjJ2G__J%2F-MUOp7C28oP1hZTdIgxJ%2Fimage.png?alt=media\&token=b9afeb20-f77f-41c7-99b6-ec230e891e12)

Language selected - Language in which the form should be displayed.&#x20;

Title - Title of the form.&#x20;

Scope - Fields that may appear on the form. &#x20;

{% hint style="info" %}
Name and email are required by default.&#x20;
{% endhint %}

Active - Make the field appear on the form when active and not appear when deactivated.&#x20;

Optional - Obliges the client to fill in when on and is optional when off.&#x20;

![](https://4075187781-files.gitbook.io/~/files/v0/b/gitbook-legacy-files/o/assets%2F-MMGy7hswNWyyiXACRWv%2F-MUOlrKZwdEDPjJ2G__J%2F-MUOqkIGNC6e31naxRyh%2Fimage.png?alt=media\&token=154dd936-a9f0-4928-9b6c-a8de5eb4fdd7)

### Configure Subjects - Case Assignment.&#x20;

{% hint style="info" %}
In this section, you will configure who will be assigned the cases sent by the customers.&#x20;
{% endhint %}

Category - Category of the case that will be sent.&#x20;

Subject - Subject to appear in the email.&#x20;

Department - You must select the department that will receive the case.&#x20;

Responsible - Employee responsible for the case.&#x20;

{% hint style="info" %}
You must have configured the [**departments**](https://en.docs.airdesk.ai/interface/administracao/espaco/departamentos).&#x20;
{% endhint %}

Pipeline - Pipeline in which the case will be inserted.&#x20;

{% hint style="info" %}
You must have [**configured the pipelines**](https://en.docs.airdesk.ai/interface/servicos/pipelines).&#x20;
{% endhint %}

Pipeline Status - State in which the case is inserted into the pipeline.&#x20;

{% hint style="info" %}
You can add more subjects and more departments.&#x20;
{% endhint %}

![](https://4075187781-files.gitbook.io/~/files/v0/b/gitbook-legacy-files/o/assets%2F-MMGy7hswNWyyiXACRWv%2F-MUOlrKZwdEDPjJ2G__J%2F-MUOqz2bGQtiBb-U9B0n%2Fimage.png?alt=media\&token=03b41e86-b6de-4d8a-8a03-77a37a70346a)

### Blocks&#x20;

Selected Language - Language in which the block will be presented.&#x20;

Title - Title of the block.&#x20;

Description - Block description.&#x20;

Avatar - Image to appear in the block.&#x20;

Link text - Text that will appear in the clickable link&#x20;

Link URL - Link to where the customer will be redirected when they click (ex: [www.airdesk.ai)\&#x20](http://www.airdesk.ai\)\&#x20);

Note - Note to appear near the link.&#x20;

{% hint style="info" %}
You can add more than one block.&#x20;
{% endhint %}

![](https://4075187781-files.gitbook.io/~/files/v0/b/gitbook-legacy-files/o/assets%2F-MMGy7hswNWyyiXACRWv%2F-MUOlrKZwdEDPjJ2G__J%2F-MUOrOUQPSSjpiP0gfgA%2Fimage.png?alt=media\&token=cba3db9b-0117-4530-8b49-3c6d8c702d13)

### Settings&#x20;

Timetable - It displays in the widget the company's working hours.&#x20;

Contacts - It displays in the widget the main contacts of the company.&#x20;

{% hint style="info" %}
You must have configured the [**company**](https://en.docs.airdesk.ai/interface/administracao/espaco/empresas-filiais).&#x20;
{% endhint %}

Domains allowed - In this field, you must add your company's domain(s) (e.g. [www.airdesk.ai).\&#x20](http://www.airdesk.ai\).\&#x20);

![](https://4075187781-files.gitbook.io/~/files/v0/b/gitbook-legacy-files/o/assets%2F-MMGy7hswNWyyiXACRWv%2F-MUOlrKZwdEDPjJ2G__J%2F-MUOrWNhbJAGVCWaZRm5%2Fimage.png?alt=media\&token=681b5a3c-0a63-4e42-a272-690871582197)

When you finish editing the form, you should save it.&#x20;

In the panel, you should see the form you just created. It's now time to add it to your website or platform.&#x20;

{% hint style="danger" %}
Advanced difficulty step. If you don't know how to do this step, send this link to your website developer.&#x20;
{% endhint %}

You can now copy the snippet, which will look like the one below and add it just before the \</head>.&#x20;

![](https://4075187781-files.gitbook.io/~/files/v0/b/gitbook-legacy-files/o/assets%2F-MMGy7hswNWyyiXACRWv%2F-MUOlrKZwdEDPjJ2G__J%2F-MUOreKrGYA0zArR_h-i%2Fimage.png?alt=media\&token=1de72f5b-654d-485f-b00f-cc679e959cd5)


# Additional Widget Options

Within the code generated by Airdesk, you can add extra widget handling options. &#x20;

Example of a code generated by Airdesk that is placed on the client's page:

```markup
 <script defer> 

      (function (a, i, r, d, e, s, k) { 

        a.airdesk = { settings: { cpid: "TEST-EXAMPLE" } }; 

        e = i.getElementsByTagName("head")[0]; 

        s = i.createElement("script"); 

        s.async = 1; 

        s.src = r + d; 

        e.appendChild(s); 

        a.$airdeskOnLoad = () => { 

          var {$airdesk} = a;

//Extra options are added below this line 

}; 

      })(window, document, "https://script.airdesk.ai/v1/", "air.js"); 

    </script> 
```

| Option                    | Explanation                                                                                                                                                                                                                                        |
| ------------------------- | -------------------------------------------------------------------------------------------------------------------------------------------------------------------------------------------------------------------------------------------------- |
| $airdesk.open()           | The widget will open the form automatically as soon as it's ready.                                                                                                                                                                                 |
| $airdesk.close()          | The widget closes the form.                                                                                                                                                                                                                        |
| $airdesk.language(CODE)   | <p>If the user doesn't have a language already saved.  <br>This option allows you to choose a starting language, instead of choosing the starting language depending on the browser's language.  Examples of CODE "en-GB", "pt-PT", "en-ES".  </p> |
| $airdesk.position(STRING) | Changes the initial positioning to a pre-effect.                                                                                                                                                                                                   |
| $airdesk.position('bl')   | Changes the widget's positioning to the lower left corner.                                                                                                                                                                                         |
| $airdesk.right(NUMBER)    | Replaces the initial positioning of the widget button on the right. The positioning is done on px basis.                                                                                                                                           |
| $airdesk.left(NUMBER)     | Replaces the initial positioning of the widget button on the left. The positioning is done on px basis.                                                                                                                                            |
| $airdesk.bottom(NUMBER)   | Replaces the initial positioning of the widget button vertically starting from below. The positioning is done on a px basis.                                                                                                                       |
| $airdesk.top(NUMBER)      | Replaces the initial positioning of the widget button vertically starting at the top. The positioning is done on a px basis.                                                                                                                       |
| $airdesk.hidden()         | Hide the page widget. It no longer allows to press the button and open the form.                                                                                                                                                                   |
| $airdesk.visible()        | Shows the widget that has been hidden.                                                                                                                                                                                                             |

{% hint style="info" %}
To use widget functions with javascript, these must always be called within a load event.&#x20;

window\.addEventListener ('load', function () {})
{% endhint %}

You can call up these options after initialization of the widget like for example make the widget, after loading on the page, automatically open the form as follows:&#x20;

```markup
 <script defer> 

      (function (a, i, r, d, e, s, k) { 

        a.airdesk = { settings: { cpid: "TEST-EXAMPLE" } }; 

        e = i.getElementsByTagName("head")[0]; 

        s = i.createElement("script"); 

        s.async = 1; 

        s.src = r + d; 

        e.appendChild(s); 

        a.$airdeskOnLoad = () => { 

          var {$airdesk} = a;

//Opções extra são adicionadas abaixo desta linha 

$airdesk.open() 

}; 

      })(window, document, "https://script.airdesk.ai/v1/", "air.js"); 

    </script> 
```

Or, it's also possible to call the options in the client's javascript after the widget is initialized, as follows:&#x20;

```markup
window.$airdesk.open(); 
```


# Email Inbox

Soon...


# Domains and URL's

Creation and management of custom domains.

![](https://4075187781-files.gitbook.io/~/files/v0/b/gitbook-x-prod.appspot.com/o/spaces%2F-MMGy7hswNWyyiXACRWv%2Fuploads%2Fi71U9rE3HLU71H7wgUrO%2Fdomains.png?alt=media\&token=061c53d7-35ec-4193-9b39-a3ecd874a530)

Airdesk gives users the option to create custom mailboxes for all types of organizations. For this to be possible, the domain that will be present in the addresses must first be validated.

By configuring the domains, you can use Airdesk as the main email service or add it to an existing service, being able to use both services at the same time.

The domain validation steps are the most important in this feature, because they are used to confirm that the domain is really yours, before moving on. Validation is based on four records made on the domain's DNS management page.

### Why do we need to verify the domain?

Airdesk strictly follows domain verification as an essential step to ensure that:

* The domain provided is valid and has not expired;
* The domain was provided by its rightful owner or by a user with permission to access the DNS configuration page;
* The domain is NOT a spoofed address to avoid any misuse or loss of service.

To carry out this verification and for the e-mail service to work, it will be necessary to register the following points:

{% content-ref url="/pages/TteIRJ2QaJN2ROZImcfX" %}
[SPF Record](/interface/administracao/espaco/domains-and-urls/spf-record)
{% endcontent-ref %}

{% content-ref url="/pages/iSB9Sd1JiuA0tFEpjKm1" %}
[DKIM Record](/interface/administracao/espaco/domains-and-urls/dkim-record)
{% endcontent-ref %}

{% content-ref url="/pages/pBBmIx0bWWvhlUnx2cft" %}
[Return Path](/interface/administracao/espaco/domains-and-urls/return-path)
{% endcontent-ref %}

{% content-ref url="/pages/e4anMmNiTDs7pvuxoEQk" %}
[MX Record](/interface/administracao/espaco/domains-and-urls/mx-record)
{% endcontent-ref %}


# SPF Record

### What is the SPF record?

The SPF record is a record added to the domain's DNS so that the receiving email servers can verify that the server's IP address is authorized to send emails on behalf of the domain. This prevents spammers from using the domain to spoof emails.

This record also helps maintain a good domain reputation, because authenticated emails are more likely to be delivered to the recipient's inbox rather than being marked as spam.

### How to configure the SPF Record

When you want to send emails using an email like **<name@yourdomain.com>**, the recipient servers look at the SPF records to validate that the email sent by Airdesk is genuine. Some servers may reject sending emails if domains do not have a valid SPF record.

To validate this record, you will have to add the SPF data in the DNS configuration area of your domain, using a **TXT** type record, and adding the following value:

```
v=spf1 a mx include:spf.eu01.email.airdesk.ai ~all
```

{% hint style="warning" %}
If you use more e-mail services, you should add the value **`include:spf.eu01.email.airdesk.ai`** to the current record, in order to avoid errors in SPF searches.
{% endhint %}

Example of an SPF record with more than one email service:

```
v=spf1 include:spf.protection.outlook.com include:spf.eu01.email.airdesk.ai  -all
```

Example of an SFP record:

<table><thead><tr><th width="244" align="center">Name / Host</th><th width="150" align="center">Type of Record</th><th width="280" align="center">Value</th><th align="center">TTL</th></tr></thead><tbody><tr><td align="center"><p><strong>@</strong> = (yourdomain.com)</p><p><strong>OR</strong></p><p><strong>subdomain</strong> =</p><p>(subdomain.yourdomain.com)</p></td><td align="center">TXT</td><td align="center">v=spf1 a mx include:spf.eu01.email.airdesk.ai ~all</td><td align="center">900</td></tr></tbody></table>

### SPF Record configuration steps

1. Access your domain manager
2. Go to DNS management for the domain you want to configure
3. Add a **TXT** record
4. In Name/Host, use **@** (if you want to configure the registration in the main domain)
5. Add the value: **`v=spf1 a mx include:spf.eu01.email.airdesk.ai ~all`**
6. Save the record

### How to validate the SPF Record

After adding the data to your domain, you can validate the registration using the “Validate Records” button in the domain configuration area on Airdesk.

![](https://4075187781-files.gitbook.io/~/files/v0/b/gitbook-x-prod.appspot.com/o/spaces%2F-MMGy7hswNWyyiXACRWv%2Fuploads%2FQz6ld3efLYciZaShEExh%2Fvalidar%20dominio.png?alt=media\&token=189cb096-720d-4aaa-a8e7-19b0f7ef60fe)

If you need help, you should email us at <support@airdesk.ai> or talk to us directly via the chat on the [website](https://airdesk.ai/).


# DKIM Record

### What is DKIM Record?

DKIM or DomainKeys Identify Mail is a registry that helps prevent email spam, spoofing and phishing. It is a digital signature attached to an outgoing email, which helps the recipient to authenticate the email.

The DKIM signature contains vital information about the cryptographic signature, hashing the email body and details on where the public key can be retrieved by the receiving SMTP server. DKIM uses public and private key cryptography for the verification process. The signer uses the private key and the verifier uses the corresponding public key to complete the email authentication process.

The receiving email server uses that public and private key to validate the origin of the email. If there is a validation failure, the recipient's server may reject the email or classify it as spam.

### How to configure the DKIM Record

To configure the DKIM record, Airdesk generates a public key and a private key unique to the chosen domain. In the domain's DNS manager, you will need to create a **TXT** record with the host generated by Airdesk with the code **airdesk-.\_domainkey.\<yourdomain.com>**.

To validate the DKIM record in DNS, you will have to put in the value field the code generated by Airdesk, starting with “v=DKIM1; …”.

![](https://4075187781-files.gitbook.io/~/files/v0/b/gitbook-x-prod.appspot.com/o/spaces%2F-MMGy7hswNWyyiXACRWv%2Fuploads%2FYBzBvJlcekbVMSb3aCwL%2Fdkim.png?alt=media\&token=6258a247-c9d7-4686-9837-ebb38ccbb4e3)

Example of a DKIM record:

<table><thead><tr><th width="223" align="center">Name / Host</th><th width="150" align="center">Type of Record</th><th width="228" align="center">Value</th><th align="center">TTL</th></tr></thead><tbody><tr><td align="center">airdesk-<strong>&#x3C;selector></strong>._domainkey.<strong>&#x3C;yourdomain.com></strong></td><td align="center">TXT</td><td align="center">v=DKIM1; t=s; h=sha256; p=APFfMA0GCSqGBiQKBgQDNVt0R/3AXuVlIz0Sx7D6SeeD8wWQI4cezBX3gQBVJTipp+vhPMCpk+GP2PHMUOB1uohD+klGmN+4DZPz8V0+R9KSETSxeOODOU/PwIDAQAB;</td><td align="center">900</td></tr></tbody></table>

### DKIM Record configuration steps

1. Access your domain manager
2. Go to DNS management for the domain you want to configure
3. Add a **TXT** record
4. In Name/Host, use the first generated record (example: airdesk-**\<selector>**.\_domainkey.**\<yourdomain.com>**)
5. Add the value starting with “**v=DKIM1; …**”
6. Save the record

### How to validate the DKIM Record

After adding the data to your domain, you can validate the registration using the “Validate Records” button in the domain configuration area on Airdesk.

![](https://4075187781-files.gitbook.io/~/files/v0/b/gitbook-x-prod.appspot.com/o/spaces%2F-MMGy7hswNWyyiXACRWv%2Fuploads%2FQz6ld3efLYciZaShEExh%2Fvalidar%20dominio.png?alt=media\&token=189cb096-720d-4aaa-a8e7-19b0f7ef60fe)

If you need help, you should email us at <support@airdesk.ai> or talk to us directly via the chat on the [website](https://airdesk.ai/).


# Return Path

### What is Return Path?

The Return Path is a setting that has a direct impact on the delivery of emails. This is a field in the header of emails that contains the address to which they will be sent.

The destination server will send a response to Return Path whenever the user has a full mailbox, or when the user does not exist, the server does not exist, spam, etc. If for any reason delivery does not occur, an email will be sent to Return Path.

### How to configure the Return Path

To configure the Airdesk Return Path, you must add a **CNAME** record to your domain's DNS settings, with the host **`adrp.<yourdomain.com>`**, where you must add the value:

```
rp.eu01.email.airdesk.ai
```

Example of a Return Path record:

<table><thead><tr><th width="217" align="center">Name / Host</th><th width="150" align="center">Type of Record</th><th width="194.09472259810553" align="center">Value</th><th align="center">TTL</th></tr></thead><tbody><tr><td align="center"><p><strong>adrp.@</strong> = (yourdomain.com)</p><p><strong>OR</strong></p><p><strong>adrp.&#x3C;subdomain></strong> =(subdomain.yourdomain.com)<br></p></td><td align="center"><strong>CNAME</strong></td><td align="center">rp.eu01.email.airdesk.ai</td><td align="center">900</td></tr></tbody></table>

### Return Path configuration steps

1. Access your domain manager
2. Go to DNS management for the domain you want to configure
3. Add a **CNAME** record
4. In Name/Host, add **`adrp.<yourdomain.com>`**
5. In the value add **`rp.eu01.email.airdesk.ai`**
6. Save the record

### How to validate the Return Path

After adding the data to your domain, you can validate the registration using the “Validate Records” button in the domain configuration area on Airdesk.

![](https://4075187781-files.gitbook.io/~/files/v0/b/gitbook-x-prod.appspot.com/o/spaces%2F-MMGy7hswNWyyiXACRWv%2Fuploads%2FQz6ld3efLYciZaShEExh%2Fvalidar%20dominio.png?alt=media\&token=189cb096-720d-4aaa-a8e7-19b0f7ef60fe)

If you need help, you should email us at <support@airdesk.ai> or talk to us directly via the chat on the [website](https://airdesk.ai/).


# MX Record

The MX Record (Mail Exchanger) is a record configured in the domain's DNS that indicates where an email should be forwarded on the internet. An MX record points to an email server, which accepts incoming emails for a domain.

This DNS feature tells the servers where the email will be delivered, in compliance with the SMTP (Simple Mail Transfer Protocol) protocols.

### How to configure the MX Record

The configuration of the MX Record is one of the most important for you to be able to use emails within Airdesk. After verifying your domain, you will be able to send emails with the accounts you create with the validated domain.

To validate this record, you will have to add the MX data in the DNS configuration area of your domain, using an MX record type, and adding the following value:

```
mx.eu01.email.airdesk.ai
```

As a priority in this record, you should use the value **10**, which is the preferred “priority” level.

Example of an MX record:

<table><thead><tr><th width="209" align="center">Name / Host</th><th width="150" align="center">Type of Record</th><th align="center">Value</th><th align="center">TTL</th></tr></thead><tbody><tr><td align="center"><p><strong>@</strong> = (yourdomain.com)</p><p><strong>OR</strong></p><p><strong>subdomain</strong> =</p><p>(subdomain.yourdomain.com)</p></td><td align="center">MX</td><td align="center">mx.eu01.email.airdesk.ai</td><td align="center">900</td></tr></tbody></table>

### MX Record configuration steps

1. Access your domain manager
2. Go to DNS management for the domain you want to configure
3. Add a **MX** record
4. In Name/Host, use **@** (if you want to configure the registration in the main domain)
5. Set Priority to **10**
6. In the value add **`mx.eu01.email.airdesk.ai`**
7. Save the record

### How to validate the MX Record

After adding the data to your domain, you can validate the registration using the “Validate Records” button in the domain configuration area on Airdesk.

![](https://4075187781-files.gitbook.io/~/files/v0/b/gitbook-x-prod.appspot.com/o/spaces%2F-MMGy7hswNWyyiXACRWv%2Fuploads%2FQz6ld3efLYciZaShEExh%2Fvalidar%20dominio.png?alt=media\&token=189cb096-720d-4aaa-a8e7-19b0f7ef60fe)

If you need help, you should email us at <support@airdesk.ai> or talk to us directly via the chat on the [website](https://airdesk.ai/).


# Deals

{% hint style="info" %}
The settings in this section are only available to workspace administrators.
{% endhint %}

{% content-ref url="/pages/-MMLxB1E7u1DSoeBsyC1" %}
[Account Type](/interface/administracao/comercial/account-type)
{% endcontent-ref %}

{% content-ref url="/pages/-MMLxAf6YcD2YSLfgrzD" %}
[Deals](/interface/administracao/comercial/deals)
{% endcontent-ref %}

{% content-ref url="/pages/-MMLxA5bzvZS\_zKjlqiu" %}
[Contracts](/interface/administracao/comercial/contracts)
{% endcontent-ref %}

{% content-ref url="/pages/-MMLx9dcgByQBOcQ3\_YE" %}
[Subscriptions](/interface/administracao/comercial/subscriptions)
{% endcontent-ref %}


# Account Type

Creating the type of customer

Possibility to create different types of accounts (e.g. Customer, Supplier, Partner). When creating customer accounts, you can then select the appropriate customer type. &#x20;

![](https://4075187781-files.gitbook.io/~/files/v0/b/gitbook-legacy-files/o/assets%2F-MMGy7hswNWyyiXACRWv%2F-MUOuTfNRX1fiv0BYKlI%2F-MUOvdp95aSjz4_7JI5w%2Fimage.png?alt=media\&token=653fdec6-e2dd-47b4-b1e0-85fc75c4dcfb)

{% hint style="info" %}
Use this field to segment and filter by customer type when creating accounts.&#x20;
{% endhint %}


# Deals

{% hint style="info" %}
The settings in this section are only available to workspace administrators.
{% endhint %}

{% hint style="info" %}
You can set up a [**pipeline**](https://en.docs.airdesk.ai/interface/administracao/pipelines) for this section.
{% endhint %}

{% content-ref url="/pages/-MMLxJTS59b1yJ\_FrzRm" %}
[Reasons for loss](/interface/administracao/comercial/deals/reasons-for-loss)
{% endcontent-ref %}

{% content-ref url="/pages/-MMLxJ5KCkoAnHqrkzd4" %}
[Reasons for cancellation](/interface/administracao/comercial/deals/reasons-for-cancellation)
{% endcontent-ref %}


# Reasons for loss

Add business loss reasons

In this section, you can add the reasons for loss of a deal and associate them with the intended company.

![](https://4075187781-files.gitbook.io/~/files/v0/b/gitbook-legacy-files/o/assets%2F-MMGy7hswNWyyiXACRWv%2F-MUOwG4YxwStkIS50wim%2F-MUOwS_t9r-3TyG0IHU9%2Fimage.png?alt=media\&token=91ec55b3-b2cb-4480-a63c-775b39331f9d)


# Reasons for cancellation

Add business cancellation reasons

In this section, you can a reason for deal cancellation and associate them to the desired company.

![](https://4075187781-files.gitbook.io/~/files/v0/b/gitbook-legacy-files/o/assets%2F-MMGy7hswNWyyiXACRWv%2F-MUOwVqVPRYNZUIlnU7P%2F-MUOw_dx041zT-_SnOQ0%2Fimage.png?alt=media\&token=d409334c-d3dc-4022-98f0-d0913e1977fd)


# Contracts

{% hint style="info" %}
The settings in this section are only available to workspace administrators.
{% endhint %}

{% hint style="info" %}
You can set up a [**pipeline**](https://en.docs.airdesk.ai/interface/administracao/pipelines) for this section.
{% endhint %}


# Types of contract

Types of contract the company works with

In this section, you can add the types of contract with which the company works.&#x20;

![](https://4075187781-files.gitbook.io/~/files/v0/b/gitbook-legacy-files/o/assets%2F-MMGy7hswNWyyiXACRWv%2F-MUOwlJ3q7MQfq5aWfxd%2F-MUOxQTFyS9v-eBob3vn%2Fimage.png?alt=media\&token=8842f03d-c022-4bd2-a6cf-b70d947b3b80)

Companies - The company to which the type of contract must be associated.&#x20;

Code - Contract type code.&#x20;

Name - Name of the type of contract.&#x20;

Minimum Invoicing Interval (min) - Minimum interval that the type of contract supports.&#x20;

Rounding margin(min) - Minimum rounding margin that the contract supports.&#x20;

Opening hours - Opening hours at which the contract is active.&#x20;

File - Files may be attached to the type of contract.&#x20;


# Subscriptions

{% hint style="info" %}
The settings in this section are only available to workspace administrators.
{% endhint %}

{% hint style="info" %}
You can set up a [**pipeline**](https://en.docs.airdesk.ai/interface/administracao/pipelines) for this section.
{% endhint %}


# Types of subscription

Types of subscription the company works with

![](https://4075187781-files.gitbook.io/~/files/v0/b/gitbook-legacy-files/o/assets%2F-MMGy7hswNWyyiXACRWv%2F-MUOxbKpPSUOk3oPWw1G%2F-MUOxtC1qeQclDWektlB%2Fimage.png?alt=media\&token=407ec0ca-0db7-4643-8ff0-d34e061904bf)

Companies - Companies to which the type of subscription will be associated.&#x20;

Code - Code of the type of subscription.&#x20;

Name - Name of the type of subscription.&#x20;

Files - You can attach files to the type of subscription.&#x20;


# Services

{% hint style="info" %}
The settings in this section are only available to workspace administrators.
{% endhint %}


# Calls

{% hint style="info" %}
The settings in this section are only available to workspace administrators.
{% endhint %}

{% hint style="info" %}
You can configure a [**pipeline**](https://en.docs.airdesk.ai/interface/administracao/pipelines) for this section.&#x20;
{% endhint %}


# Pipeline

Creation of call pipelines

In this section, you can create pipelines to classify the status of your calls.

![](https://4075187781-files.gitbook.io/~/files/v0/b/gitbook-legacy-files/o/assets%2F-MMGy7hswNWyyiXACRWv%2F-MUOyA7fa9y1BqCJRbnt%2F-MUOyIbrMyRBC4bod3md%2Fimage.png?alt=media\&token=c990af5d-5d51-421c-be0e-48fc0e63bf37)


# Reasons for cancellation

In this section, you can add a cancellation reason. &#x20;

You just need to give a name to the cancellation reason and indicate the company's name. &#x20;

{% hint style="info" %}
You should have the [**companies configured**](https://en.docs.airdesk.ai/interface/administracao/espaco/empresas-filiais) first.&#x20;
{% endhint %}

![](https://4075187781-files.gitbook.io/~/files/v0/b/gitbook-legacy-files/o/assets%2F-MMGy7hswNWyyiXACRWv%2F-MUOyNkjMZzK0oDXFJG_%2F-MUOyj-I_LbuSO-blrhM%2Fimage.png?alt=media\&token=7011cce0-36a0-4e52-8ab0-13d7b2a44268)


# Projects

{% hint style="info" %}
The settings in this section are only available to workspace administrators.
{% endhint %}

{% hint style="info" %}
You can configure a [**pipeline**](https://en.docs.airdesk.ai/interface/administracao/pipelines) for this section.
{% endhint %}


# Project types

In this section, you can add project types to classify projects under development. &#x20;

Companies/Subsidiaries - The name of the company associated with the project. &#x20;

![](https://4075187781-files.gitbook.io/~/files/v0/b/gitbook-legacy-files/o/assets%2F-MMGy7hswNWyyiXACRWv%2F-MUP03x0-sgO5UOGx_Rz%2F-MUP0OFe5wyxMpZflD7O%2Fimage.png?alt=media\&token=69685e4a-3024-4643-87e5-44d7ae7704cd)

Type - Type of project. &#x20;

Description - Brief description of the project. &#x20;

Domain - Domain of the project. &#x20;

Files - Possibility to add a file related to the project.&#x20;


# Reasons for cancellation

In this section, you can add a cancellation reason. You just need to give a name to the cancellation reason and indicate the company's name. &#x20;

{% hint style="info" %}
You should have the [**companies**](https://en.docs.airdesk.ai/interface/administracao/espaco/empresas-filiais) configured first.&#x20;
{% endhint %}

![](https://4075187781-files.gitbook.io/~/files/v0/b/gitbook-legacy-files/o/assets%2F-MMGy7hswNWyyiXACRWv%2F-MUP0RHbeyLpPDfy-Q4j%2F-MUP0UgUf4SQY1hgo33r%2Fimage.png?alt=media\&token=bd1e652a-135e-42a8-ad15-1020f556f594)


# Cases

{% hint style="info" %}
The settings in this section are only available to workspace administrators.
{% endhint %}

{% hint style="info" %}
You can configure a [**pipeline**](https://en.docs.airdesk.ai/interface/administracao/pipelines) for this section.&#x20;
{% endhint %}


# Reasons for cancellation

In this section, you can add a cancellation reason. You just need to give a name to the cancellation reason and indicate the company's name. &#x20;

{% hint style="info" %}
You should have the [**companies**](https://en.docs.airdesk.ai/interface/administracao/espaco/empresas-filiais) configurated first.&#x20;
{% endhint %}

![](https://4075187781-files.gitbook.io/~/files/v0/b/gitbook-legacy-files/o/assets%2F-MMGy7hswNWyyiXACRWv%2F-MUP0mnx4-hr_Inc3lsj%2F-MUP0vpeNxxmh5PipLI6%2Fimage.png?alt=media\&token=70218119-0175-4206-9eed-c22a6aeed4f1)


# Tasks

{% hint style="info" %}
The settings in this section are only available to workspace administrators.
{% endhint %}

{% hint style="info" %}
You can configure a [**pipeline**](https://en.docs.airdesk.ai/interface/administracao/pipelines) for this section.&#x20;
{% endhint %}


# Reasons for cancellation

In this section, you can add a cancellation reason. You just need to give a name to the cancellation reason and indicate the company's name. &#x20;

{% hint style="info" %}
You should have the [**companies**](https://en.docs.airdesk.ai/interface/administracao/espaco/empresas-filiais) configurated first.&#x20;
{% endhint %}

![](https://4075187781-files.gitbook.io/~/files/v0/b/gitbook-legacy-files/o/assets%2F-MMGy7hswNWyyiXACRWv%2F-MUP1fKZqVYfyczv03Bf%2F-MUP1gVrZxceLCNJzdR5%2Fimage.png?alt=media\&token=a4d1486f-14e9-40fc-a51c-c7e0acdcfaaa)


# Checklist Template

In this section, you can create a Checklist template by adding the name of the template and the company it's associated with. You can also search or add an item to the checklist.

![](https://4075187781-files.gitbook.io/~/files/v0/b/gitbook-legacy-files/o/assets%2F-MMGy7hswNWyyiXACRWv%2F-MUP1mvDdI1ASU3KbBWO%2F-MUP1qNdQxSdMnmd5Z6T%2Fimage.png?alt=media\&token=3ff18bb0-ec6d-4f0c-9cc1-464680f09f74)


# Time

{% hint style="info" %}
The settings in this section are only available to workspace administrators.
{% endhint %}

{% content-ref url="/pages/-MMLezqd6xZPGR0QBlK2" %}
[Types of time](/interface/administracao/servicos/time/untitled-1)
{% endcontent-ref %}

{% content-ref url="/pages/-MMLezGcHlxPPE2NcE\_z" %}
[Inefficient time ratios](/interface/administracao/servicos/time/untitled)
{% endcontent-ref %}


# Types of time

In this section, you can create a type of time by adding the company and the proper name. You should have the companies configured first.

![](https://4075187781-files.gitbook.io/~/files/v0/b/gitbook-legacy-files/o/assets%2F-MMGy7hswNWyyiXACRWv%2F-MUP2Fsl6g6tPGn1vYu9%2F-MUP2GSHGSfnnwGN1qGf%2Fimage.png?alt=media\&token=5ddcc907-8de1-43fd-8502-5d62d5c49cee)


# Inefficient time ratios

In this section, you can add an inefficient time ratio. You just need to give a name to the inefficient time type and indicate the name of the company. &#x20;

![](https://4075187781-files.gitbook.io/~/files/v0/b/gitbook-legacy-files/o/assets%2F-MMGy7hswNWyyiXACRWv%2F-MUP2LY0-etsUZ5AFRdq%2F-MUP2NyRZeNPOivmyF8w%2Fimage.png?alt=media\&token=f6d8414a-a7f0-4cac-bd8b-56920bcde74a)

{% hint style="info" %}
You should have the [**companies**](https://en.docs.airdesk.ai/interface/administracao/espaco/empresas-filiais) configured first.&#x20;
{% endhint %}


# Marketing

{% hint style="info" %}
The settings in this section are only available to workspace administrators.
{% endhint %}

{% content-ref url="/pages/-MMLcF9O3YbKMC0UVQgW" %}
[Social Media](/interface/administracao/marketing/social-media)
{% endcontent-ref %}


---

[Next Page](/llms-full.txt/1)